Health Score Service Integration with Qualtrics
SysTrack integrates with Qualtrics, a leading platform for user sentiment analysis, so that you can use SysTrack device health scores in Qualtrics.
To use the integration, complete the configuration steps from the following sections in SysTrack and in Qualtrics.
NOTE: This health score integration requires an SFTP server for which SysTrack must have write access and Qualtrics must have read, write, list, and delete access.
Configure the Integration in SysTrack
Open SysTrack Configure, and follow these steps:
-
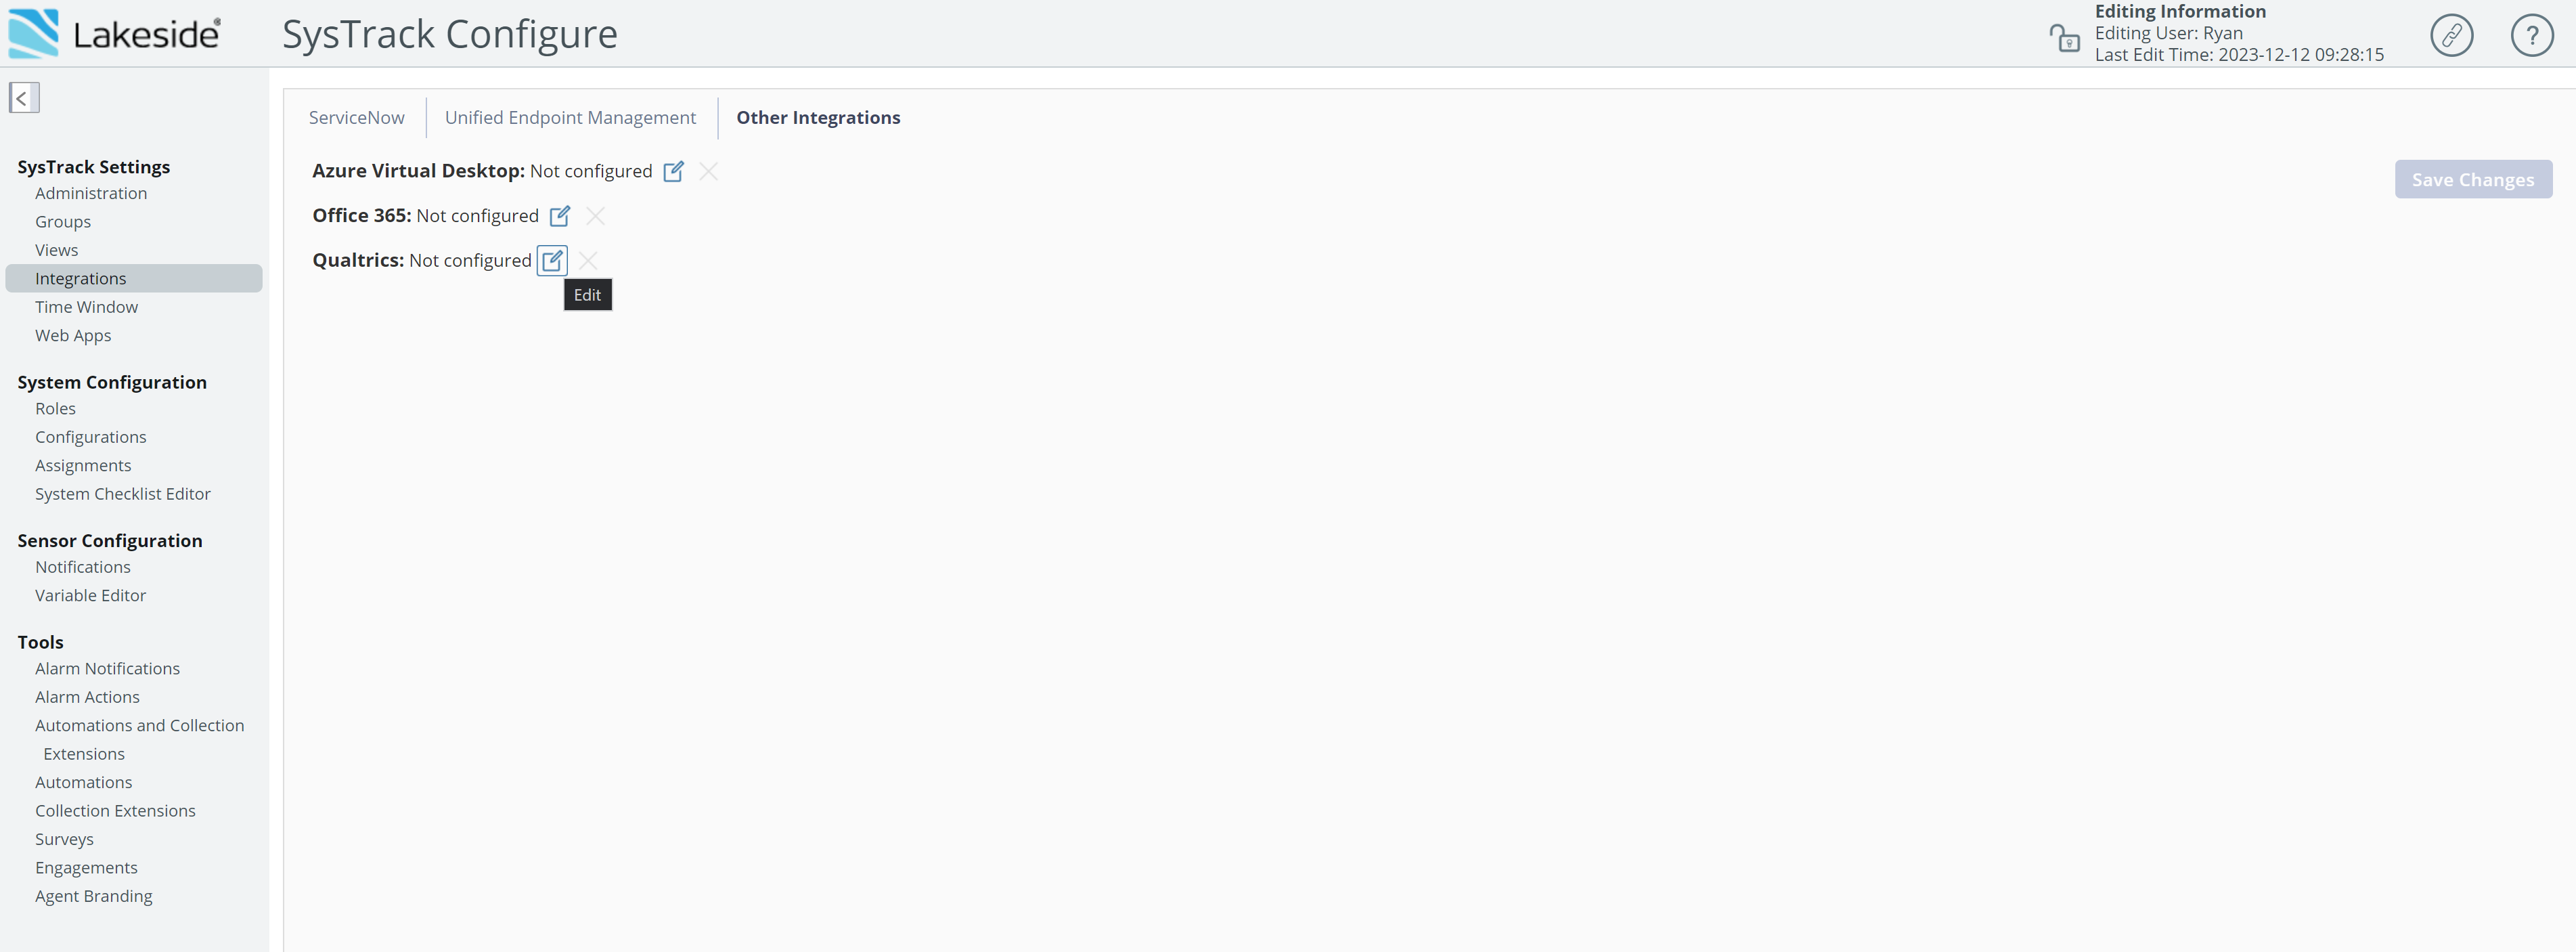
In the left menu under SysTrack Settings, select Integrations.
-
Select Other Integrations.
-
Select the lock so that you can edit the page.
-
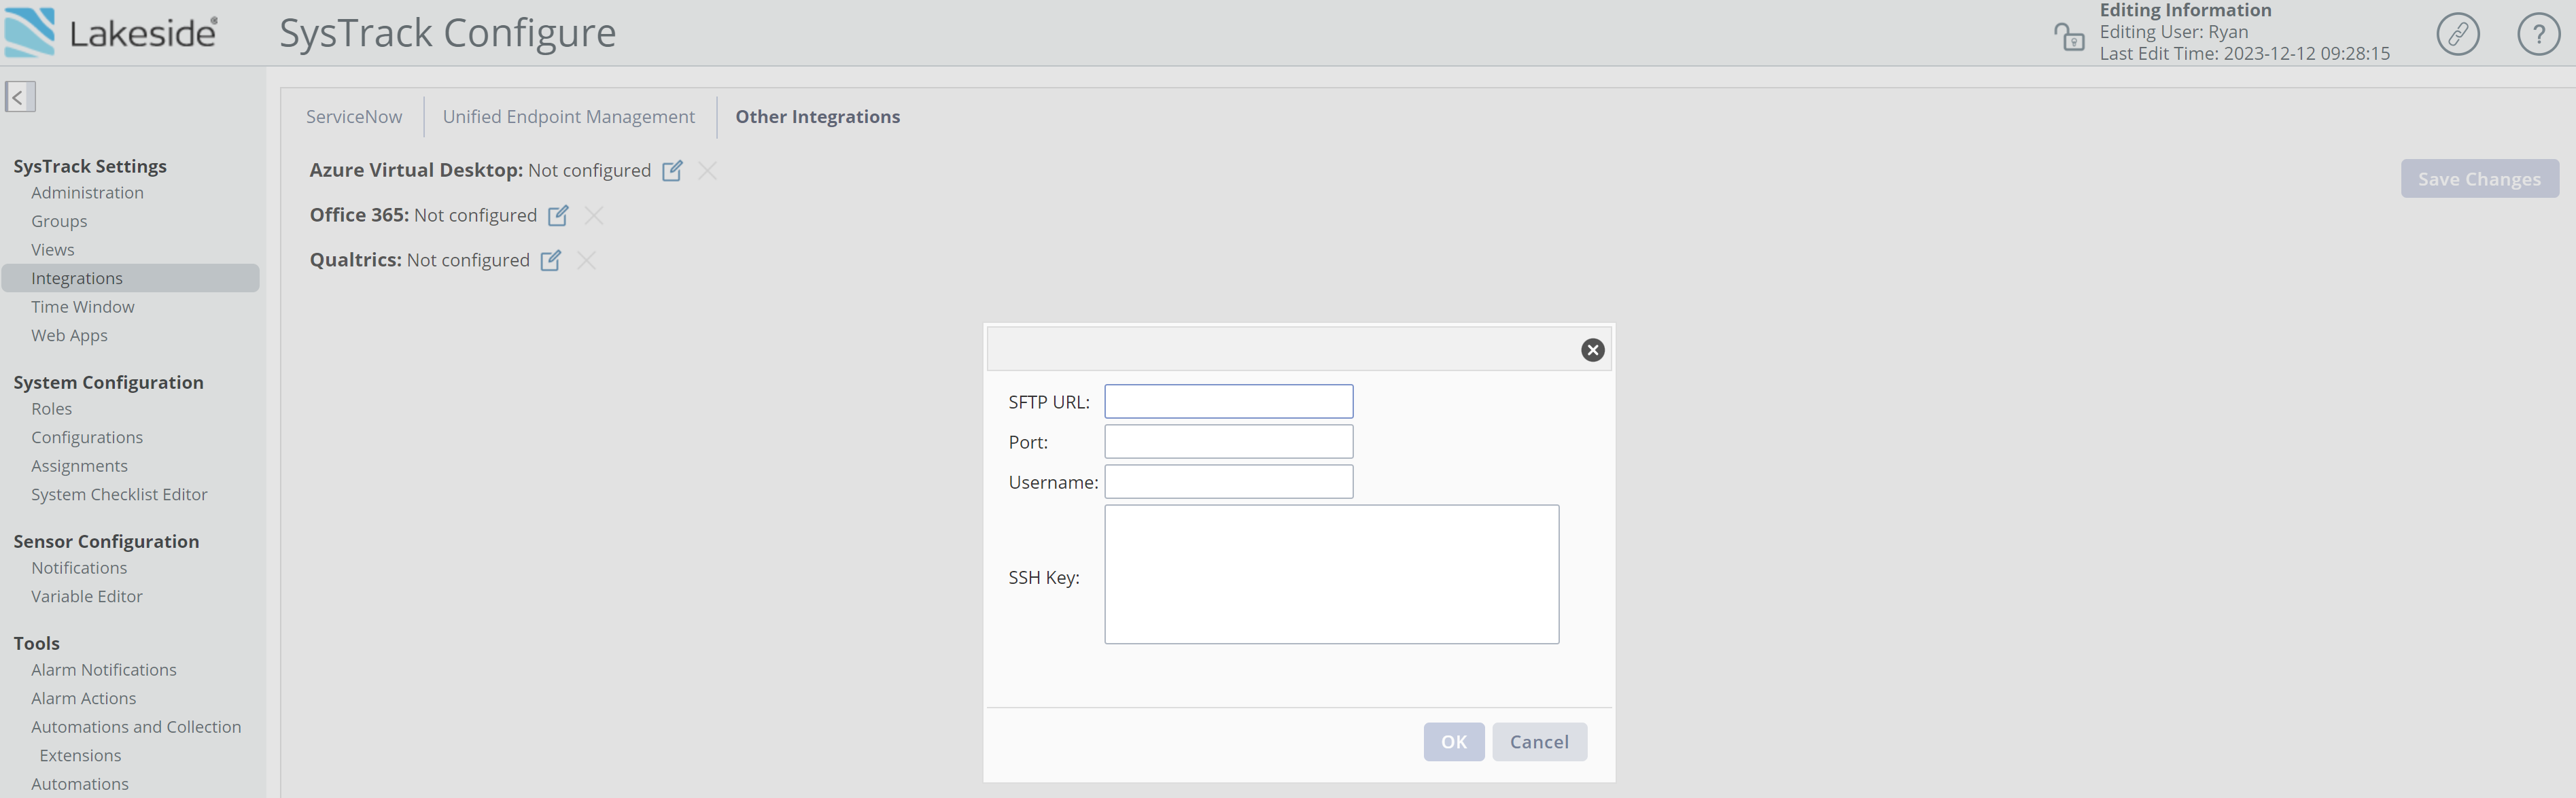
Next to Qualtrics, select the edit button. A dialog box with four fields appears.
TIP: For these four fields, you need details about your SFTP server.
-
In the SFTP URL field, enter the SFTP URL of your SFTP server.
-
In the Port field, enter the port of your SFTP server.
-
In the Username field, enter the Username for your SFTP server.
-
In the SSH Key field, enter the SSH key of your SFTP server.
Make sure your configuration in Qualtrics (explained in the following sections) is complete so that your integration can work.
Configure a Project and Workflow in Qualtrics
In Qualtrics, complete the configuration pieces explained in the following three sections.
Configure a Qualtrics Imported Data Project
You need to have a correctly configured Imported Data Project in Qualtrics, as explained in these steps:
-
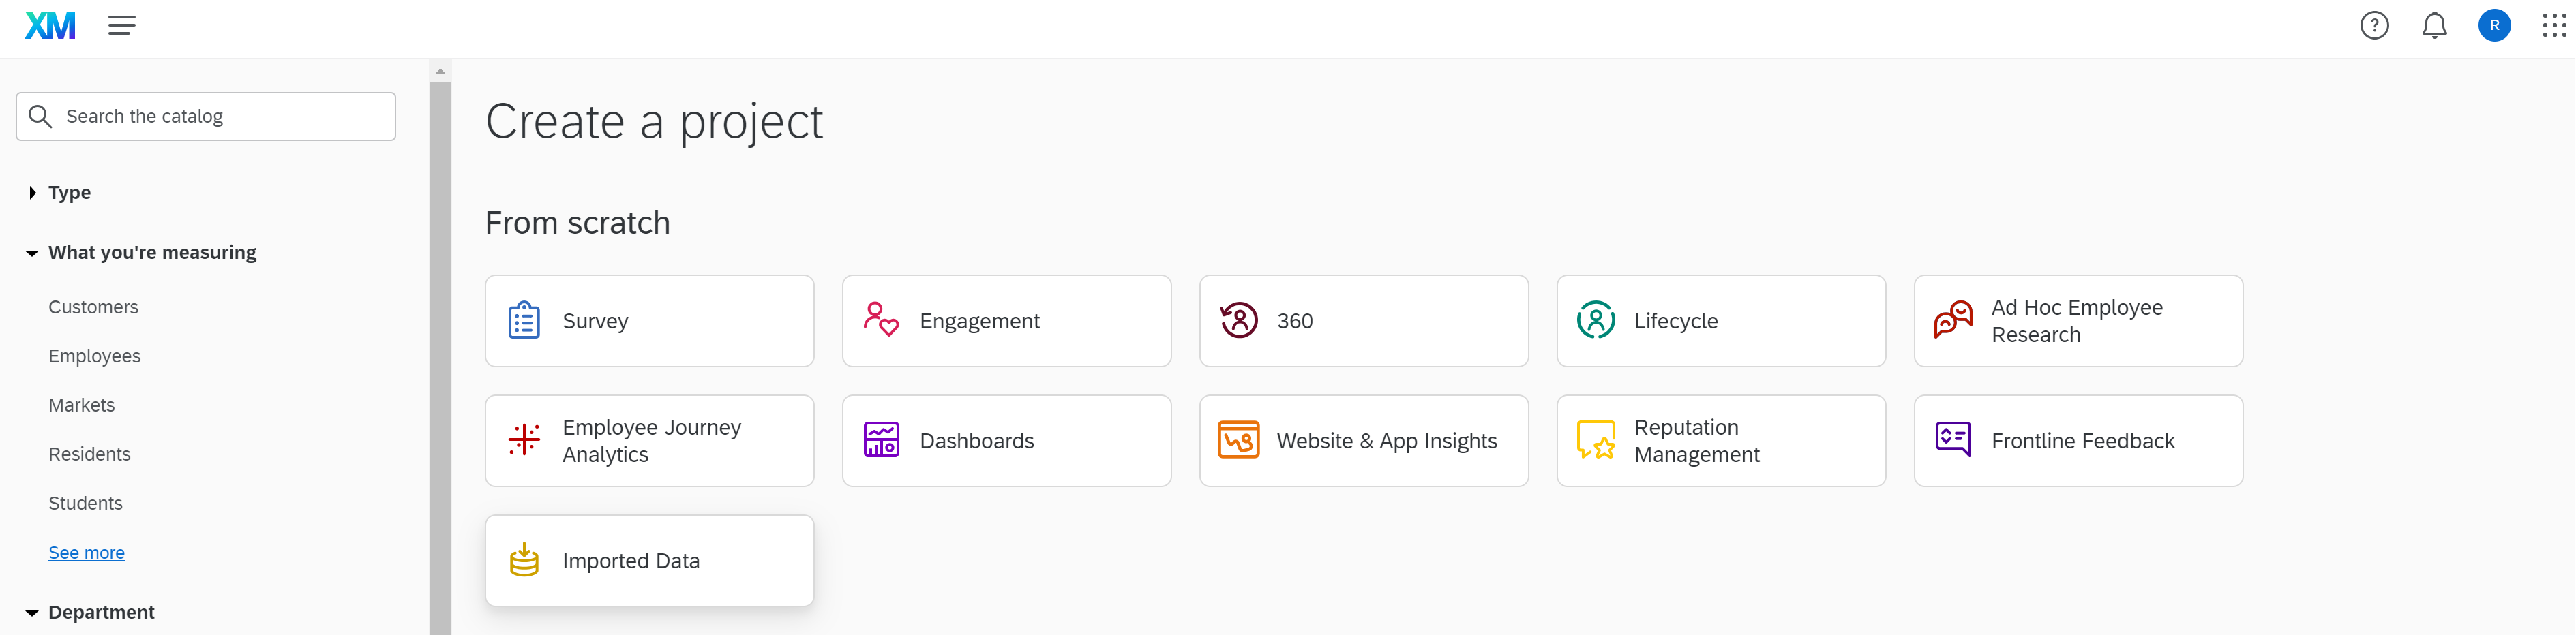
Sign in to Qualtrics and view your home page.
-
Select the Home menu, and select Projects.

-
On the Projects page, select the Create Project button.
-
On the Create a project page, select Imported Data, and then select the Get Started button.
NOTE: Your Qualtrics user must have the Use Imported Data Projects permission enabled.
-
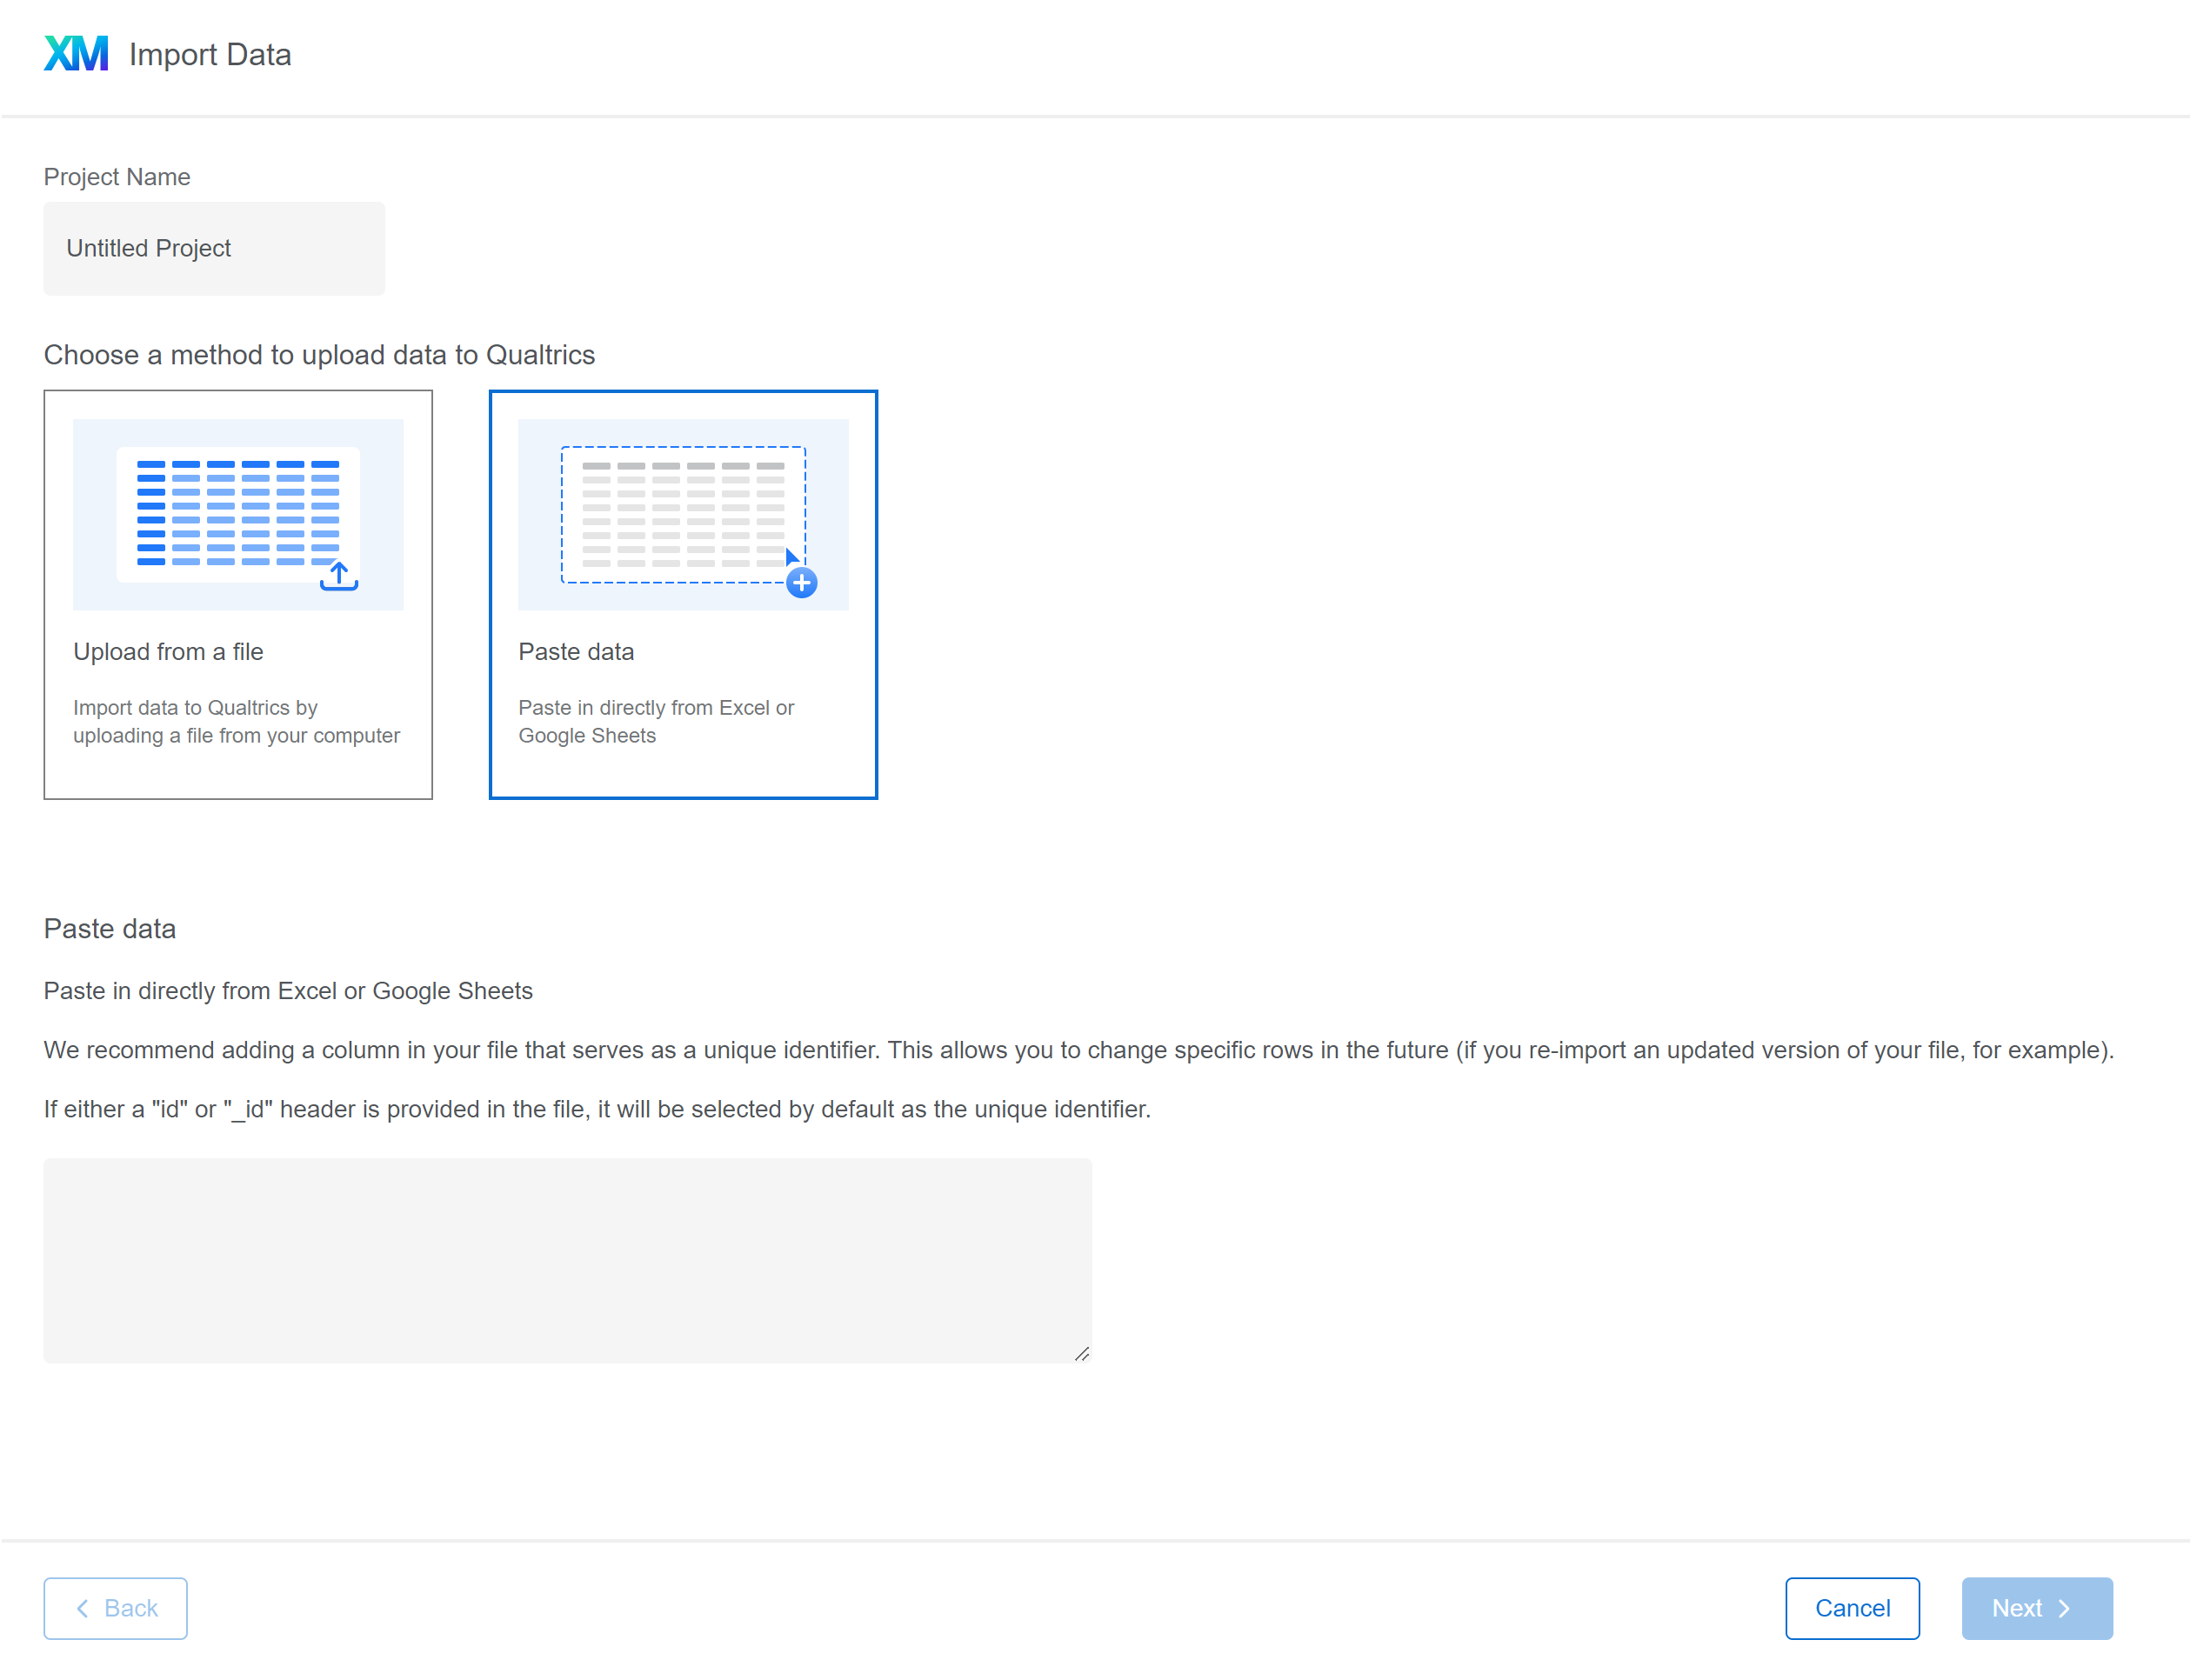
In the Project Name field, name your project (for example, SysTrack Health Score).
-
Under Choose a method to upload data to Qualtrics, select Paste data.
-
In the Paste data text box, paste the following data:
UniqueIdentifier,HealthScore,Date
TIP: Alternatively, you could put this same data into a CSV file, and then use the Qualtrics Upload from a file option to upload the CSV file.
-
Select Next.
-
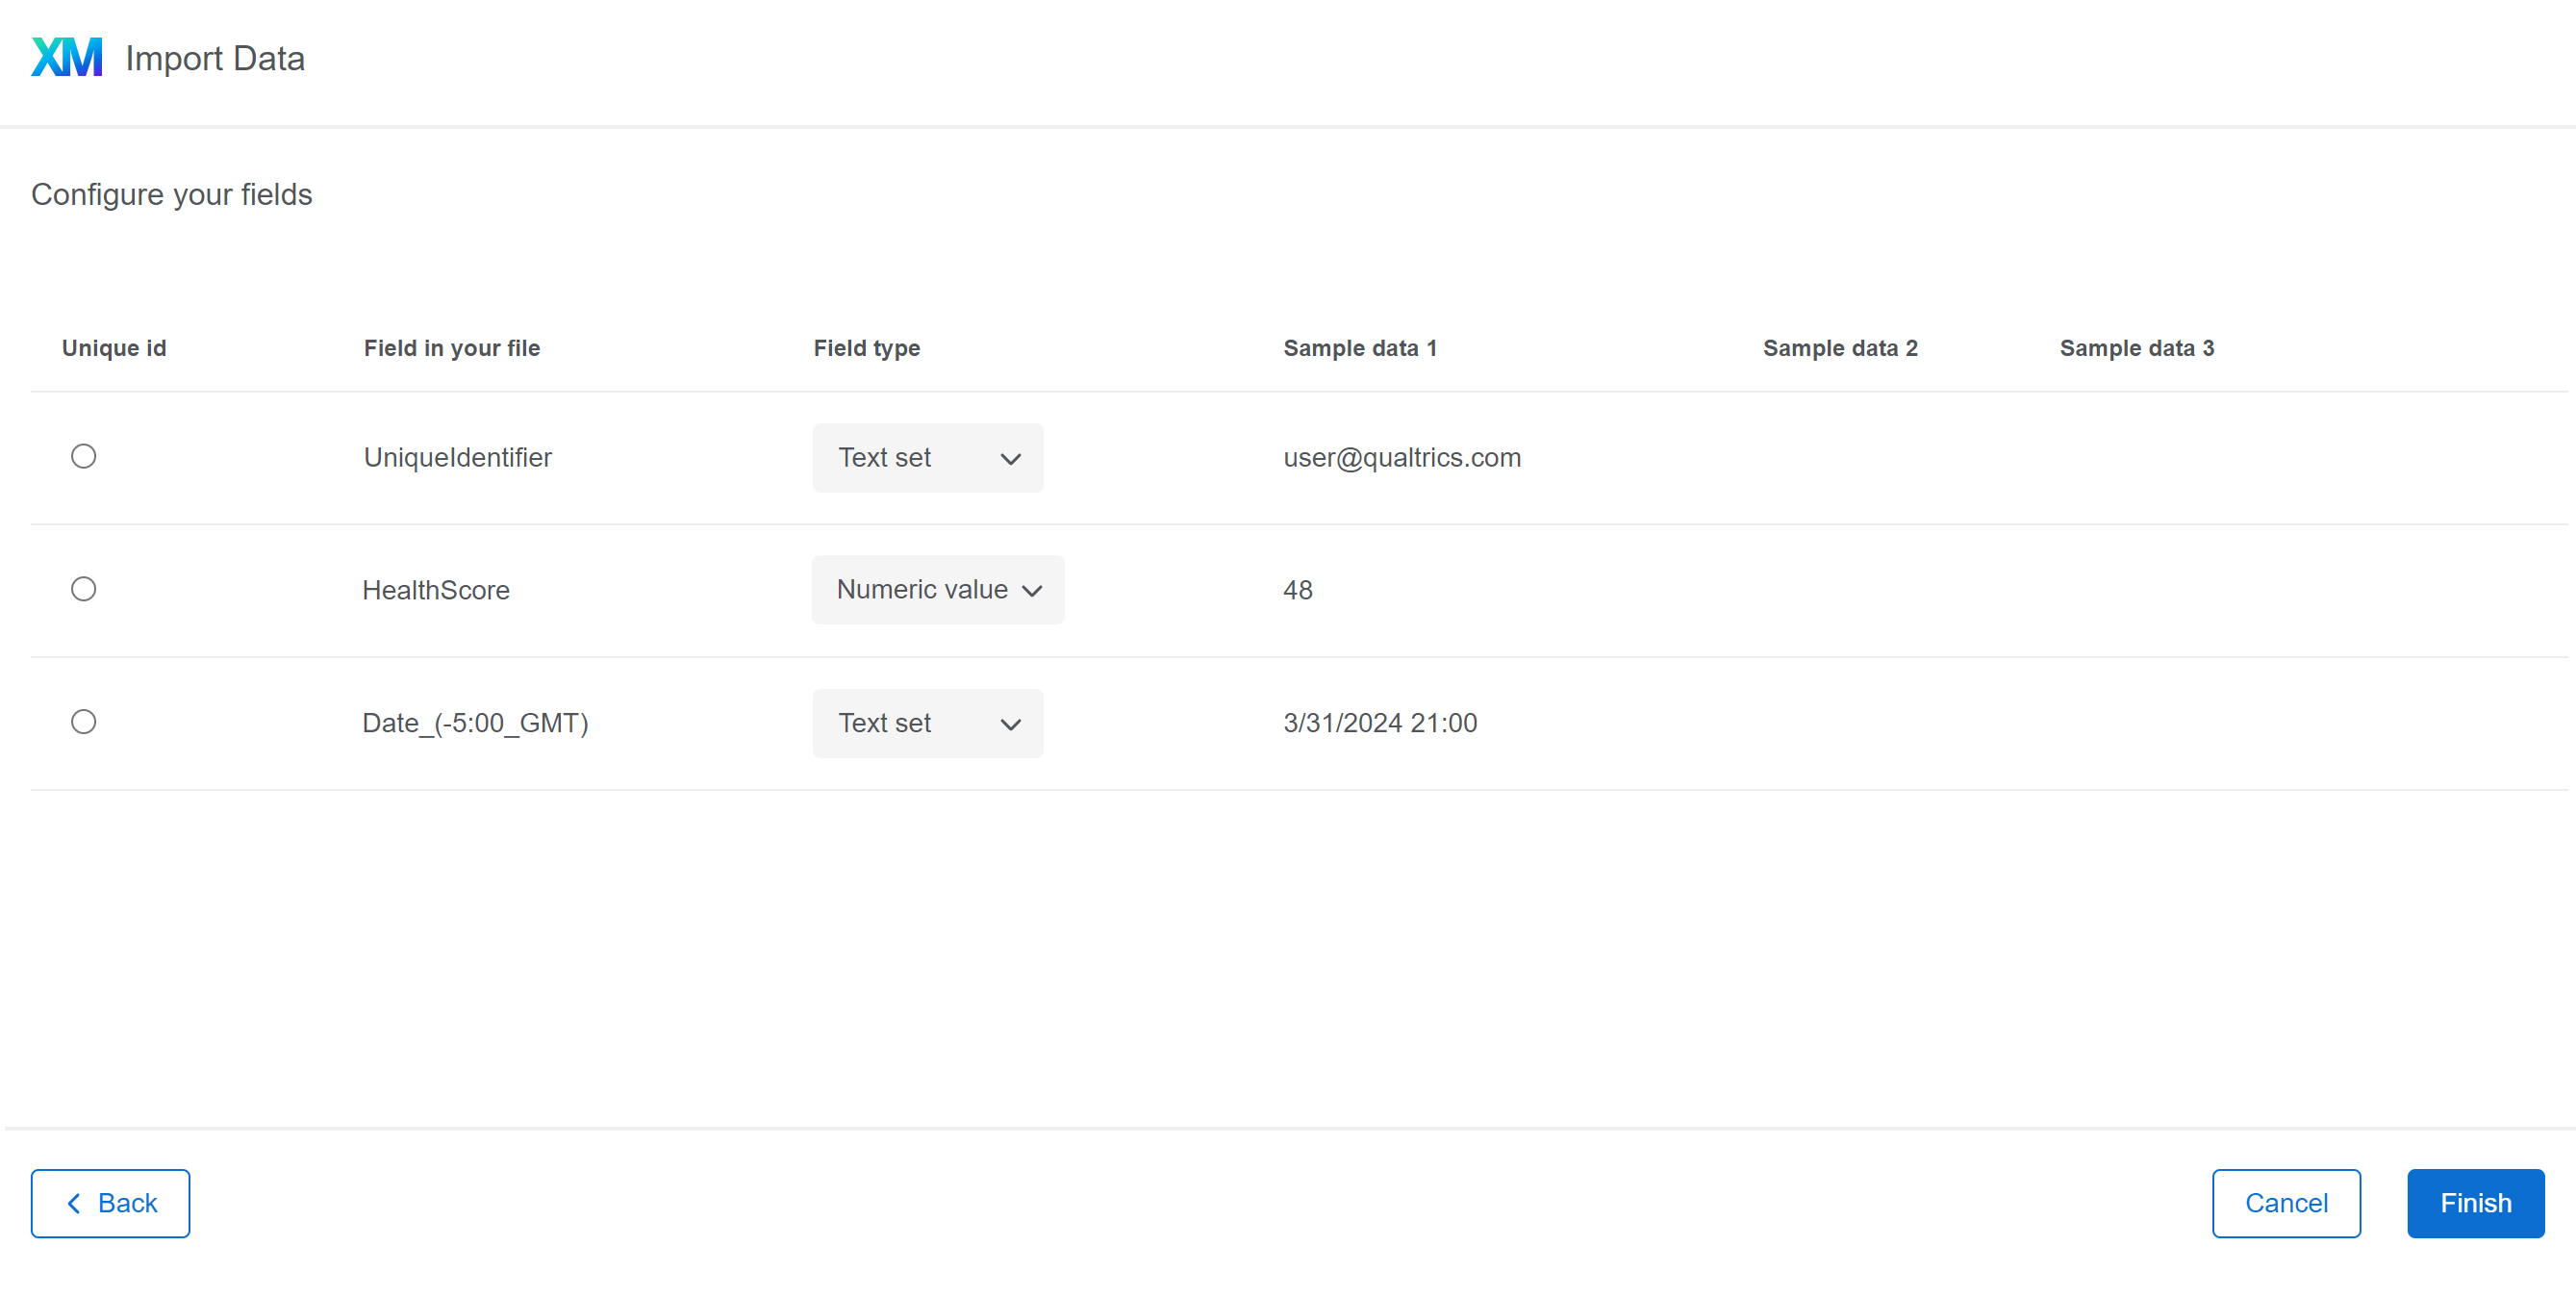
On the Configure your fields page, select a Field type for each of the three fields:
-
Unique Identifier: Select Text set.
-
Health Score: Select Numeric value.
-
Date: Select Text set.
-
-
Select Finish.
-
Select Finish.
Your Imported Data Project is complete, and you can proceed to configuring your workflow in Qualtrics.
Configure a Qualtrics Workflow
After you create the imported data project, you create a workflow in that project.
-
In your imported data project, select the Workflows tab.
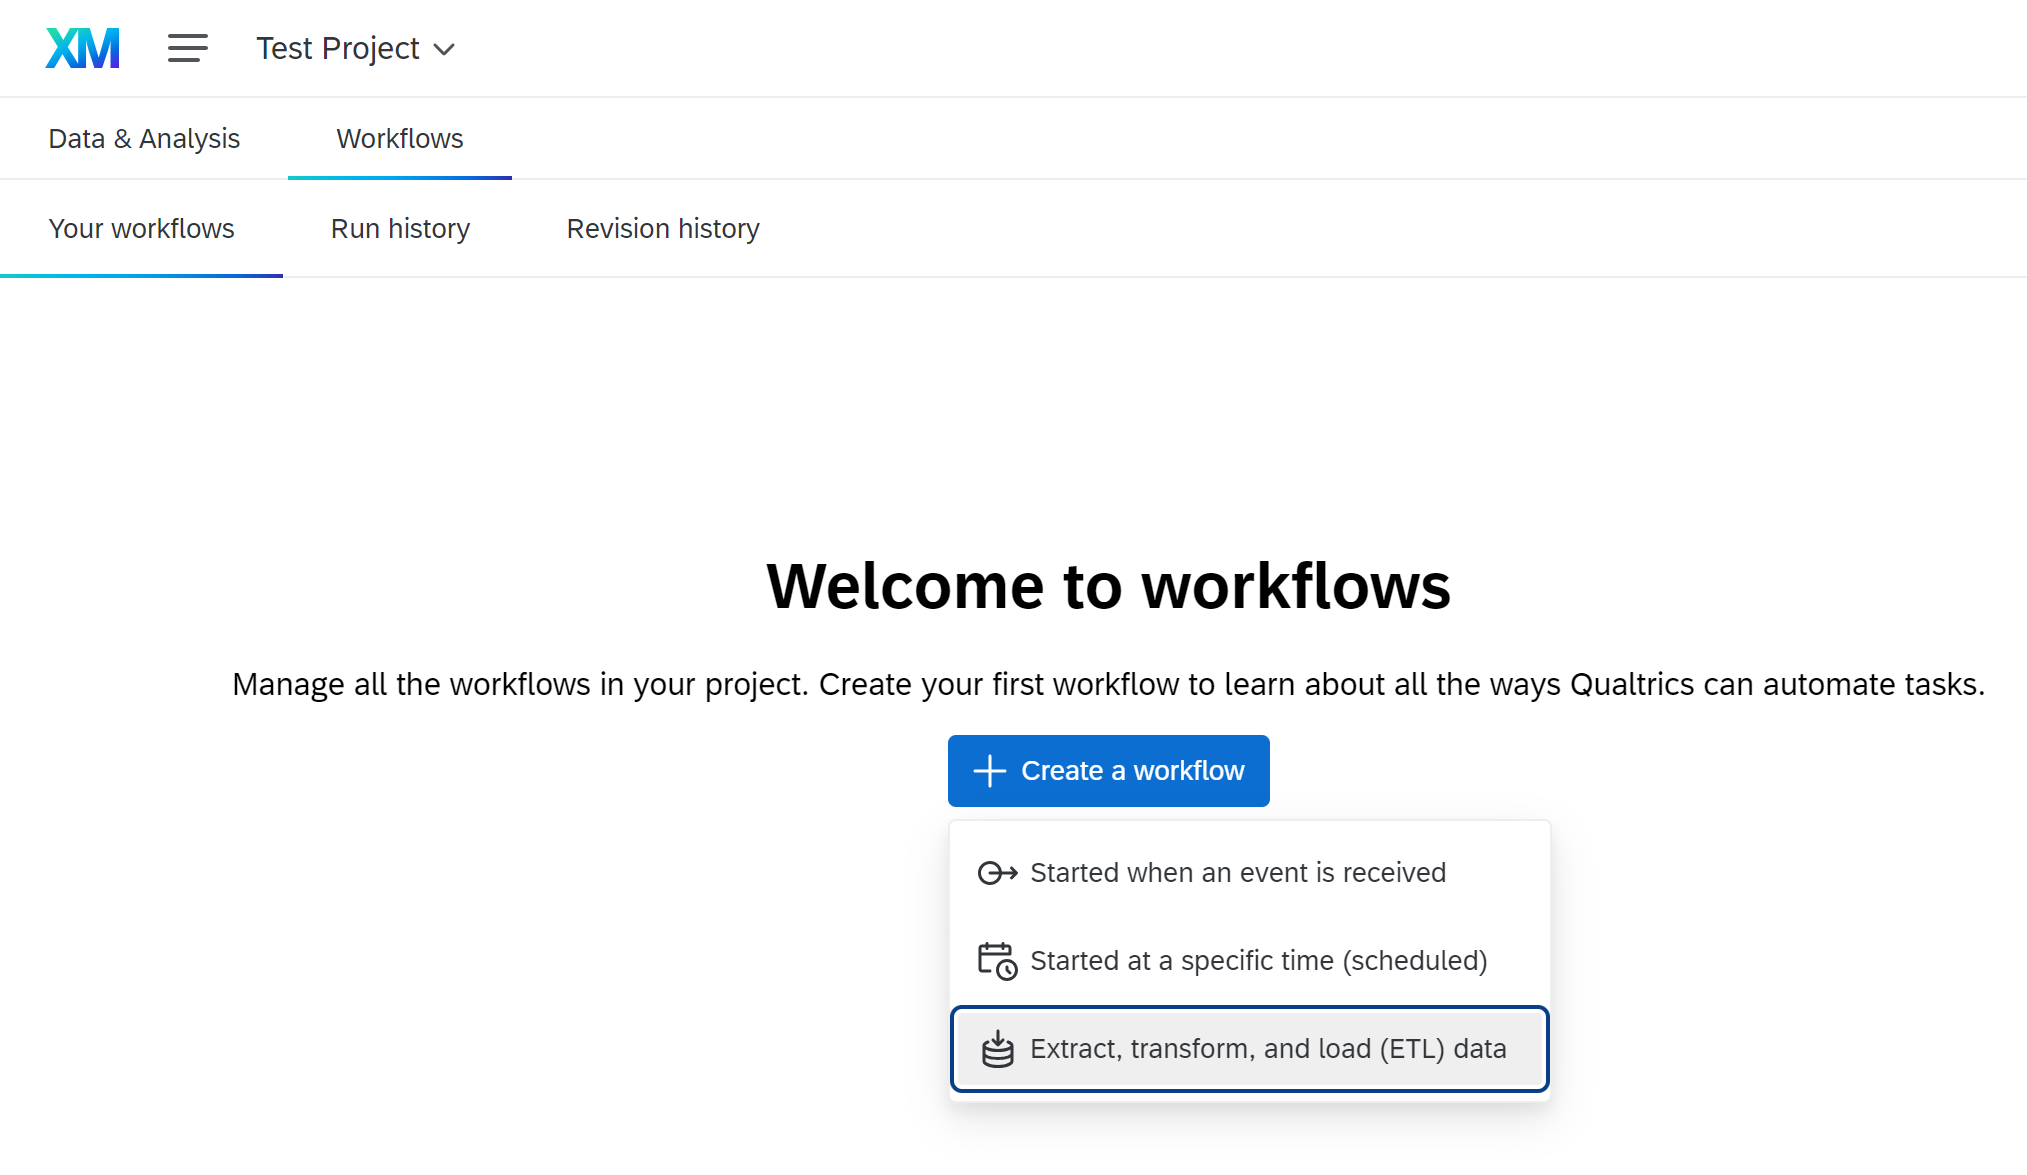
-
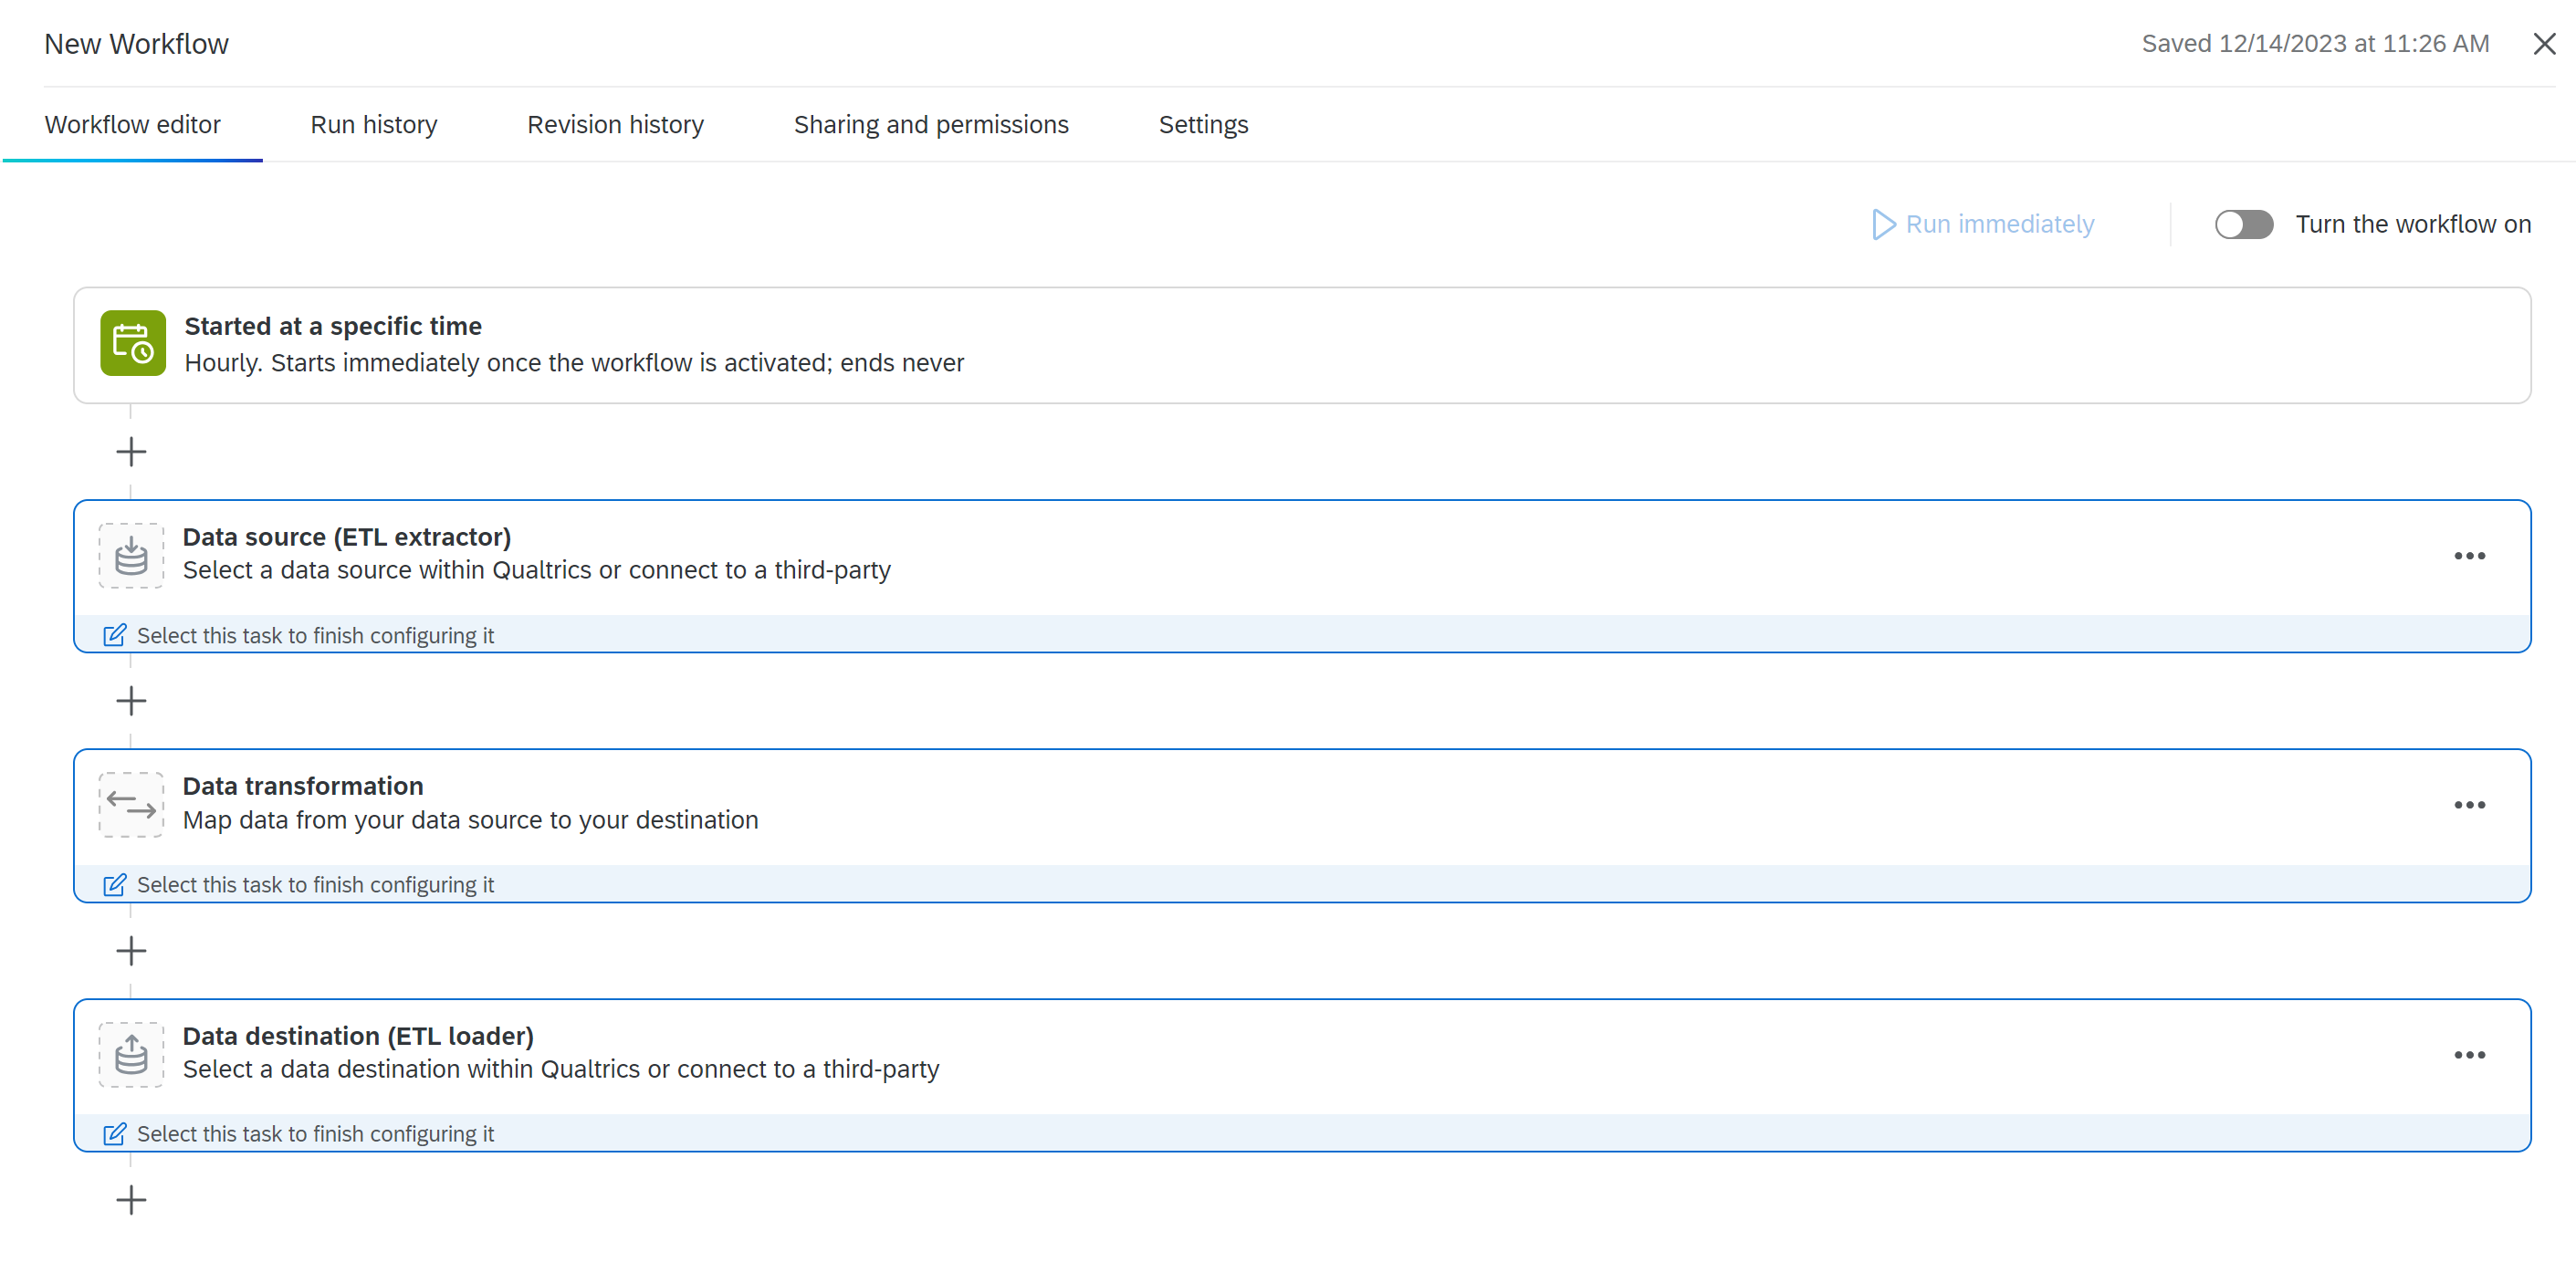
Select the Create a Workflow button, and select the Extract, transform, and load (ETL) data option. The Started at a Specific Time dialog box appears.
-
In the Frequency field, select Hourly.
-
For Time Zone, Starts, and Ends, select the options you prefer.
-
Select Save.
Now you have a workflow that you can continue to configure:
-
On the Workflow editor tab, select Data source (ETL extractor).
-
In the Select an extension that matches what you want to do dialog box, select the Extract data from SFTP files option. The Extract data from SFTP files dialog box appears.
-
Select the Add a user account button.
-
Add the following information for the user account that you want to connect:
-
In the Name field, add the name for the user who will extract the data from the SFTP server.
-
In the Hostname and Port fields, add the host name and port for your SFTP server.
-
In the Authentication method field, select SSH key.
-
In the Username field, add the user name for the user who will extract the data from the SFTP server.
-
If you want to use a new SSH Key for the extraction, select Generate SSH keypair.
NOTE: If you already have your SSH keypair, select Provide a private key and enter the key there.
-
In the SSH key field that appears, enter the key you generated or the key you already had.
-
-
Select the Connect account button.

The Choose account page of the Extract data from SFTP files dialog box appears.
-
Select the Account that you created in the previous steps, and select Next. The Create a connection between your SFTP server and Qualtrics page of the Extract data from SFTP files dialog box appears.
-
In the File name pattern field, enter Qualtrics_.
IMPORTANT: The file name pattern must be exactly Qualtrics_ in order for the integration to work.
-
In the Pickup directory field, enter healthscore.
IMPORTANT: The pickup directory must be exactly healthscore (all lowercase) in order for the integration to work.
-
In the Delimiter field, select Comma.
-
Select the radio button for Delete the processed file (default).
-
Under Upload a sample file, select the Choose file button, and select Upload to upload a CSV file of sample data. The CSV file that you upload must include the following data:
Day of the Year,System ID,System Name,Health Score,Email
-
After your file uploads, the Verify fields section appears. Verify that your fields are correct, and select Save.
Qualtrics returns you to the Workflow editor tab.
-
Select Data destination (ETL loader). The Select an extension that matches what you want to do dialog box appears.
-
Select Load into a data project. The Load into a data project page appears.
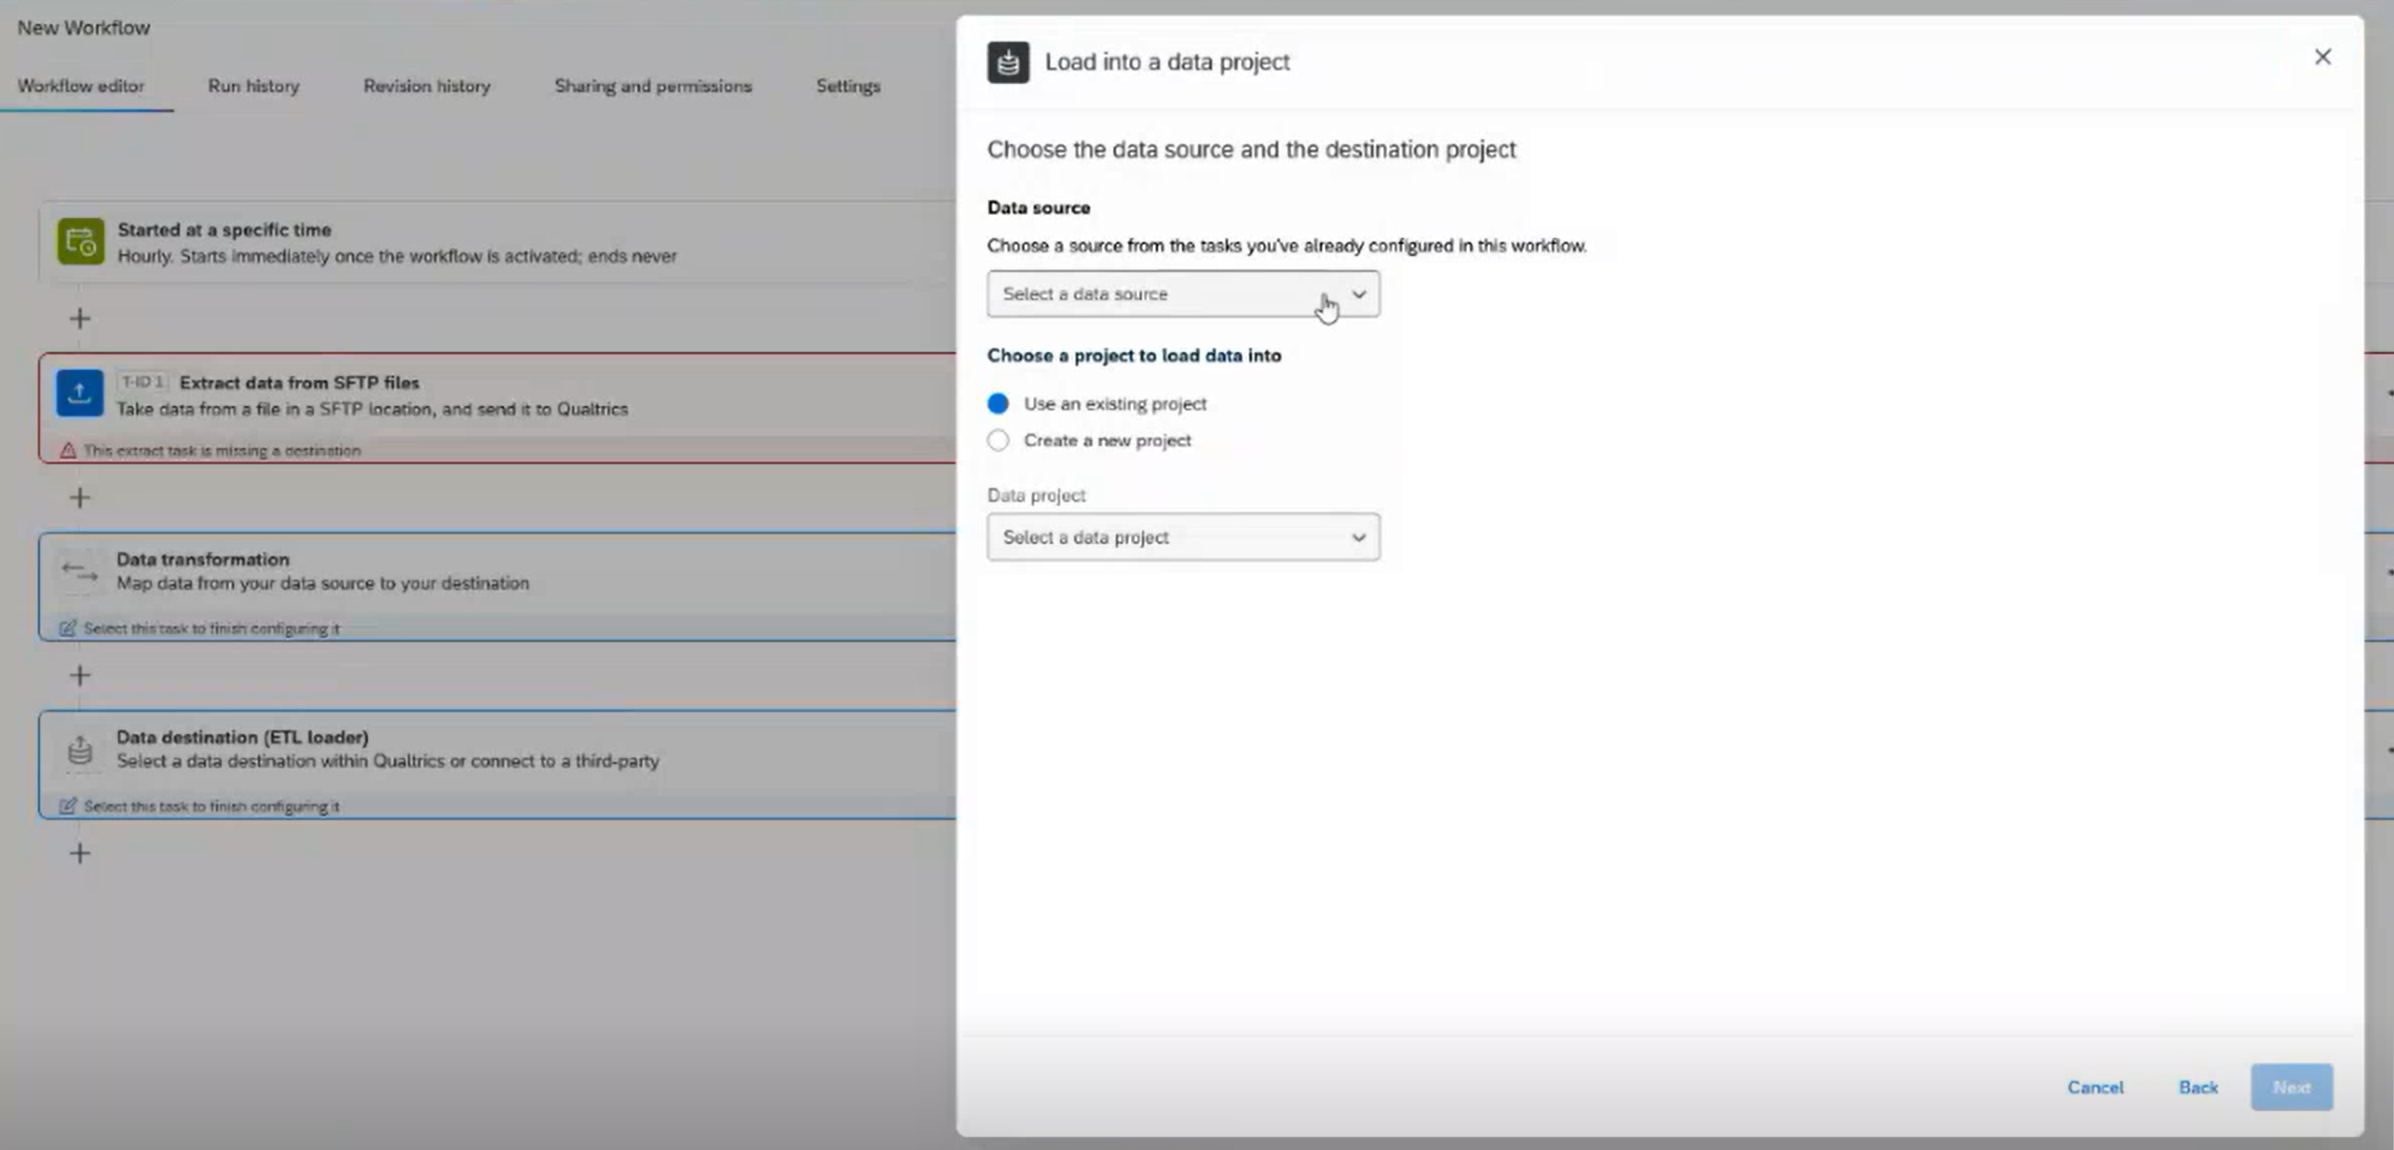
-
In the Choose a source from the tasks you've already configured in this workflow field, select T1 Extract Data from SFTP Files.
-
Select the Use an existing project radio button.
-
In the Data project field, select the data project that you just created. The Map data page appears.

-
Map each source field to a data project field for your data. Then select Save.
-
Qualtrics returns you to the Workflow editor tab.
-
Toggle the Turn the workflow on toggle to On, and select Yes in the Are you sure? box that appears.
Your integration is now complete.
IMPORTANT: SysTrack's Visualizer updates your data through this integration every 24 hours. Therefore, after you first create the integration, wait 24 hours so that Visualizer has time to do its initial import of your data. Then, you will see data from SysTrack populating your fields, and your data will be refreshed on that 24-hour cycle.
View Your SysTrack Data in a Qualtrics Data Table
After you first create the integration, wait 24 hours so that SysTrack's Visualizer has time to do its initial import of your data. Then you can follow these steps to see data from SysTrack populate your fields:
-
In Qualtrics, go to the Data & Analysis tab.
-
In the Data Table, you see:
-
Your users under UniqueIdentifier.
-
Their health scores under HealthScore.
-
The date of the health score under Date.
-
The date that the health score was imported to Qualtrics under Recorded Date.
-
View Your SysTrack Data in a Qualtrics Dashboard
To see your data in a Qualtrics dashboard, see the Qualtrics documentation about creating and configuring dashboards.
On This Page