Use the Power BI Connector
To use the Power BI Connector, follow these steps:
-
Start Power BI Desktop.
-
Go to Get data from another source.

-
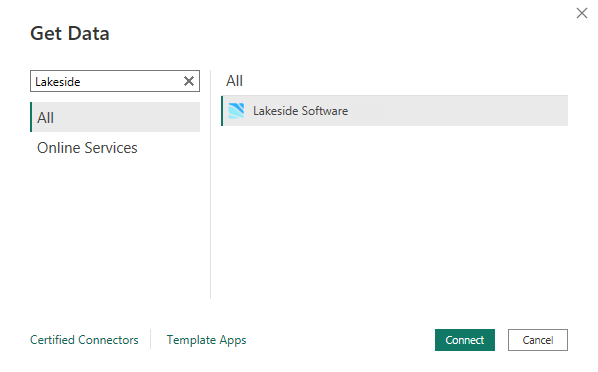
Enter Lakeside in the search window.
-
Select Lakeside Software.
-
Click Connect.
-
The Connecting to a third-party service dialog box opens. Click Continue.
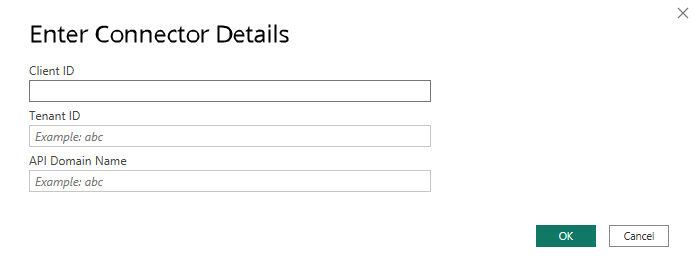
The Enter Connector Details dialog box appears.
-
Enter your Client ID, which is based on your cloud URL.
IMPORTANT: The Client ID that you need to enter in the Enter Connector Details dialog box is the same as the Cloud ID that you can find on the Tenant Information page in SysTrack. The following table lists most of the Client IDs. But, for some specialized configurations, you might have to look up your Cloud ID in SysTrack.
If your cloud URL is: Then your Client ID is: cloud.lakesidesoftware.com eab7a011-36fc-4c1b-94dd-cb6f31473ff3 cloud-au.lakesidesoftware.com 84220ad6-2194-4096-b2c7-4cb311ba4090 cloud-ca.lakesidesoftware.com 48368da0-6642-429e-915e-68f4d6cbb3b1 cloud-fr.lakesidesoftware.com c61fbf03-9787-44e9-bf33-283cea7ae065 cloud-de.lakesidesoftware.com e7f082f2-a855-44da-a5e3-9a6ee3d777b4 cloud-uk.lakesidesoftware.com 4b68aeaa-cb67-4280-87a1-016fecb772b3 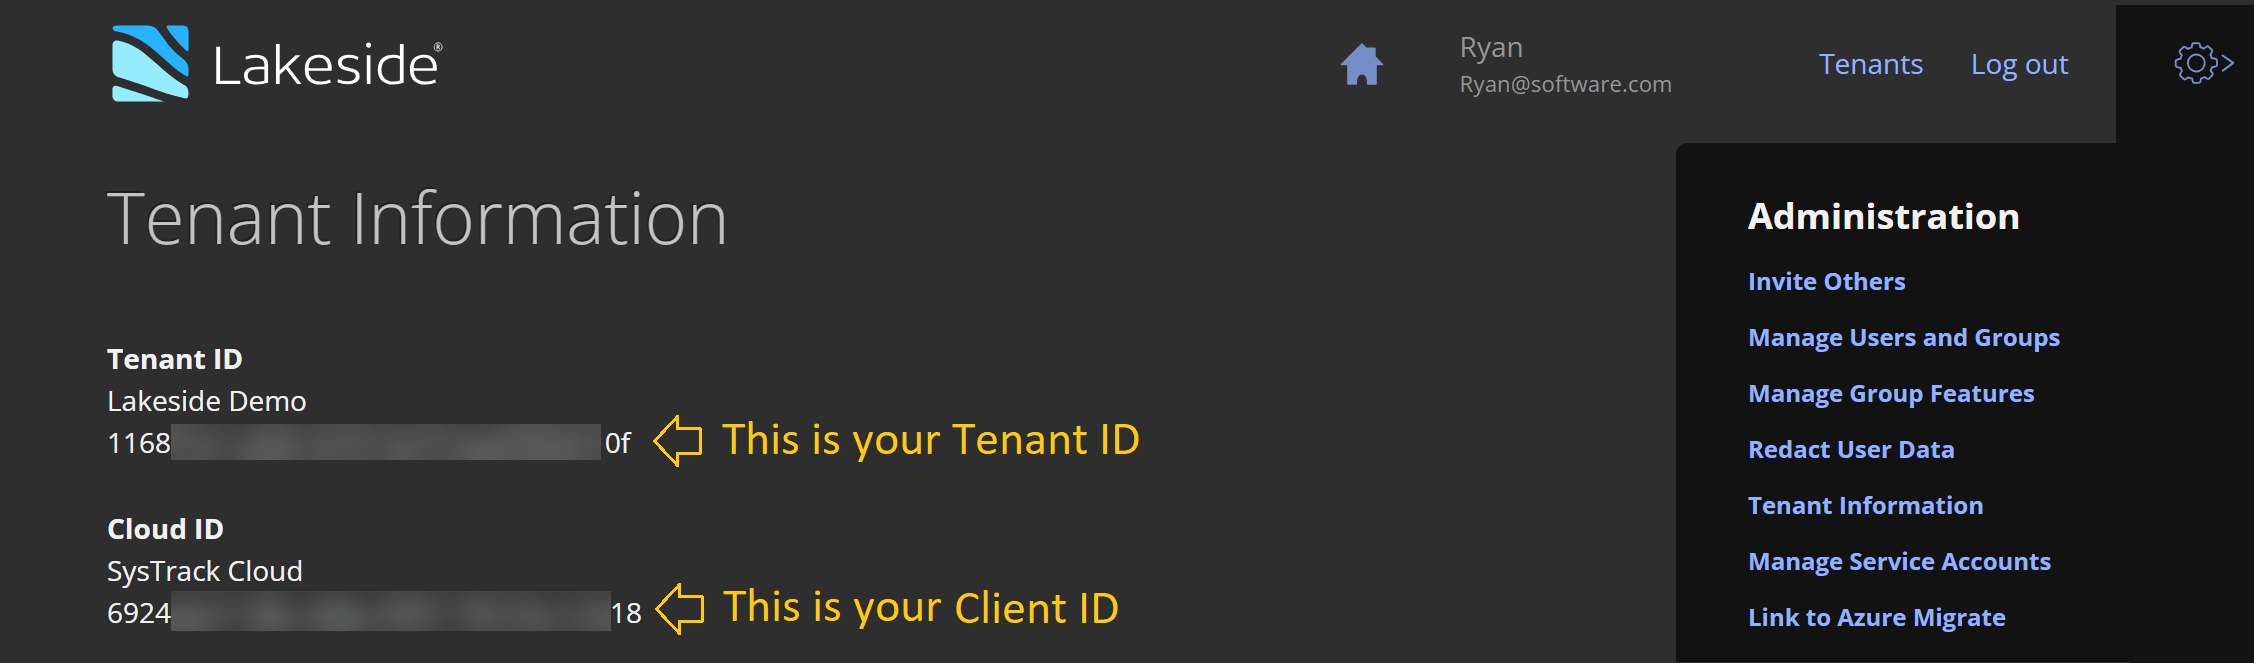
-
Enter your Tenant ID.
You can find your Tenant ID on the Tenant Information page in SysTrack.
-
Enter your API Domain Name, which is simply your Cloud FQDN or the cloud URL at which you access SysTrack.
To find your API Domain Name, look at the URL in your browser when you access SysTrack. (The most common URLs are shown in the left column of the preceding table in Step 7.)

-
Click OK in the Enter Connector Details dialog box to save the details you entered.
-
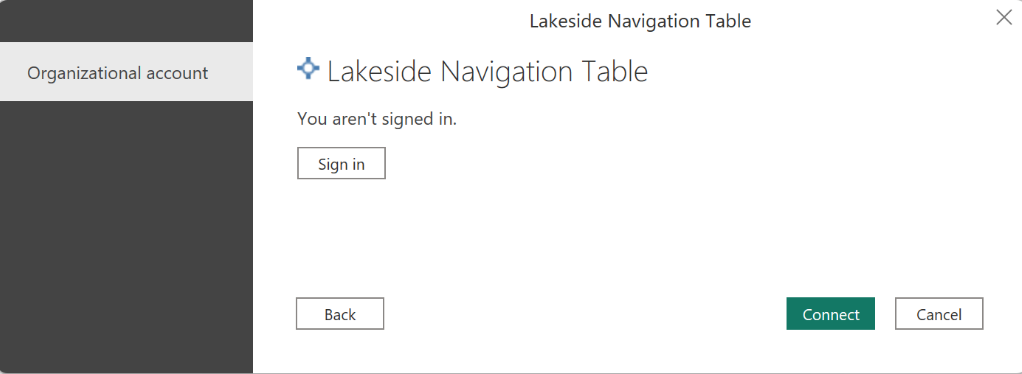
Sign in to the Lakeside Navigation Table.
-
Click Connect.
-
Add your datasets.
On This Page