BitLocker Installation Guide
Minimum Version
This DEX Pack requires SysTrack version 10.1 or higher.
Notes
-
After this DEX Pack is installed, it may take up to 24 hours for data to appear.
-
If you update or reinstall this DEX Pack, you must reassign any Views created below to the SF_BitLocker Role.
Import Kit
To use this DEX Pack, the corresponding Kit must be imported to SysTrack.
If you have already imported the DEX Pack directly from the Kits page, the Import Kit step is complete. You may move on to the next step.
If you are viewing this DEX Pack in the Customer Gateway, follow these steps to import this DEX Pack Kit:
-
On the DEX Pack page, download the DEX Pack ZIP file
-
In SysTrack, open Kits
-
Under Local, click Select Kit File
-
Select the DEX Pack ZIP File
Enable Collection Extensions
-
Verify you have unlocked the tenant next to your username
-
In Configure, click Collection Extensions on the left
-
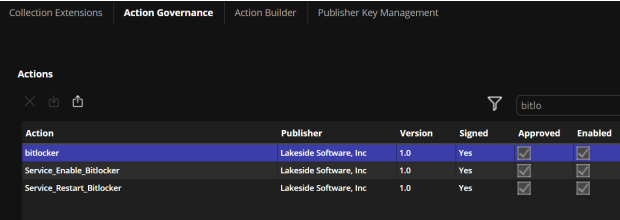
Select Action Governance
-
Find the bitlocker action in the list and check approved and enabled on the far right for all.
-
Click Save Changes at the top right
BitLocker View
The BitLocker Dashboard requires you to make a View for the SF_BitLocker Role.
To create the new View:
-
Navigate to Configure > Views
-
Click the padlock icon in the upper-right to enable editing
-
Click the plus icon to add a new View
-
Fill in the Settings as follows:
-
View Name: SF_BITLOCKER
-
Existing Category: Custom
-
Expires in: 30 Days
-
When Expired: Overwrite
-
Do NOT check “When overdue by 1 day(s)”
-
Set the Refresh drop-downs to Daily, Inside, 24x7, and “Every Day”
-
Copy this SQL query, and paste it into the box under SQL Selection > Generic
-
Click Test SQL. A Test Success message should appear. If the test is not successful, the query may have been copied incorrectly
-
-
Click Create View at the top-right
To assign the new View:
-
Navigate to Configure > Roles
-
Use the drop-down at the top to select the SF_BitLocker Role.
-
Click Views, then check the box next to SF_BITLOCKER
-
Click Save Changes at the top-right
Copy SF_BITLOCKER
SELECT
    T0.WGUID,
    GETUTCDATE() AS VWTIME,
    S0.STRVALUE AS MountPoint,
    S1.STRVALUE AS EncryptionMethod,
    T0.AutoUnlockEnabled,
    T0.AutoUnlockKeyStored,
    T0.MetadataVersion,
    S2.STRVALUE AS VolumeStatus,
    S3.STRVALUE AS ProtectionStatus,
    S4.STRVALUE AS LockStatus,
    T0.EncryptionPercentage,
    T0.WipePercentage,
    S5.STRVALUE AS VolumeType,
    T0.CapacityGB,
    S6.STRVALUE AS KeyProtector
FROM ((((((DYNI_BITLOCKER AS T0
LEFT JOIN SASTR_DYN AS S0 ON T0.MountPoint = S0.STRINGID)
LEFT JOIN SASTR_DYN AS S1 ON T0.EncryptionMethod = S1.STRINGID)
LEFT JOIN SASTR_DYN AS S2 ON T0.VolumeStatus = S2.STRINGID)
LEFT JOIN SASTR_DYN AS S3 ON T0.ProtectionStatus = S3.STRINGID)
LEFT JOIN SASTR_DYN AS S4 ON T0.LockStatus = S4.STRINGID)
LEFT JOIN SASTR_DYN AS S5 ON T0.VolumeType = S5.STRINGID)
LEFT JOIN SASTR_DYN AS S6 ON T0.KeyProtector = S6.STRINGID
BitLocker Role
This DEX Pack requires you to assign the SF_BitLocker Role to the relevant Configurations:
-
Navigate to Configure > Configurations
-
Click the padlock icon in the upper-right to enable editing
-
Use the drop-down at the top to select a relevant Configuration, or create a new Configuration
-
Assign SF_BitLocker Role to the Configuration by dragging it from Available Roles to Assigned Roles
-
Click Save Changes at the top-right
-
Repeat this process for any other relevant Configuration
On This Page