AVD Assessment and Management Installation Guide
Minimum Version
This DEX Pack requires SysTrack version 10.1 or higher.
Notes
-
After this DEX Pack is installed, it may take up to 24 hours for data to appear.
-
If you update or reinstall this DEX Pack, you must reassign any Views created below to the SF_AVD Assessment and Management Role.
Import Kit
To use this DEX Pack, the corresponding Kit must be imported to SysTrack.
If you have already imported the DEX Pack directly from the Kits page, the Import Kit step is complete. You may move on to the next step.
If you are viewing this DEX Pack in the Customer Gateway, follow these steps to import this DEX Pack Kit:
-
On the DEX Pack page, download the DEX Pack ZIP file
-
In SysTrack, open Kits
-
Under Local, click Select Kit File
-
Select the DEX Pack ZIP File
WVD Users Views
The Assessment Summary Dashboard requires you to make a View for the SF_AVD Assessment and Management Role.
-
Go to Configure > Views
-
Click the padlock in the upper-right to edit.
-
Click the plus to add a new View.
-
Enter the following Settings:
-
View Name: SF_WVD_Users
-
Expires in: 30 Days
-
Existing Category: Custom
-
When Expired: Overwrite Data
-
Do not check when overdue by 1 day(s)
-
Set the Refresh drop-downs to Do not check when overdue by 1 day(s), Inside, 24x7, and Every Day
-
-
Copy this SQL query, and paste it under SQL Selection > Generic
-
Click Test SQL. A Test Success message should appear. If the test fails, the query may have been copied incorrectly.
-
Click Create View at the top-right.
Copy SF_WVD_Users
SELECT
    T0.WGUID,
    GETUTCDATE() AS VWTIME,
    T0.UNAME,
    T0.TOTAL_MIPS,
    T0.TOTAL_MEM,
    T0.TOTAL_MINS,
    T1.ACTIVE_MIPS,
    T1.ACTIVE_MEM,
    T1.ACTIVE_MINS,
    T2.PROFILE_SIZE,
    T3.TOTAL_IMPACT,
    100-((T3.TOTAL_IMPACT/T1.ACTIVE_MINS)*100) AS HEALTH_SCORE,
    T4.TOTAL_TX_BYTES
FROM ((((
    SELECT
        T0.WGUID,
        S0.STRVALUE AS UNAME,
        AVG(T0.PRIV_CPU_MIPS + T0.USER_CPU_MIPS) AS TOTAL_MIPS,
        AVG(T0.MEM_AVG) AS TOTAL_MEM,
        COUNT(T0.WGUID)*10 AS TOTAL_MINS
    FROM SASYSUSERS AS T0
    INNER JOIN SASTRUSER AS S0 ON T0.ACCOUNT_ID = S0.STRINGID
    WHERE S0.STRVALUE NOT LIKE '%SYSTEM%'
    GROUP BY
        T0.WGUID,
        S0.STRVALUE
) AS T0
LEFT JOIN (
    SELECT
        T0.WGUID,
        S0.STRVALUE AS UNAME,
        AVG(T0.PRIV_CPU_MIPS + T0.USER_CPU_MIPS) AS ACTIVE_MIPS,
        AVG(T0.MEM_AVG) AS ACTIVE_MEM,
        COUNT(T0.WGUID)*10 AS ACTIVE_MINS
    FROM SASYSUSERS AS T0
    INNER JOIN SASTRUSER AS S0 ON T0.ACCOUNT_ID = S0.STRINGID
    WHERE
        T0.WUSAGE = 3
        AND S0.STRVALUE NOT LIKE '%SYSTEM%'
    GROUP BY
        T0.WGUID,
        S0.STRVALUE
) AS T1 ON T0.WGUID = T1.WGUID AND T0.UNAME = T1.UNAME)
LEFT JOIN (
    SELECT
        T0.WGUID,
        S0.STRVALUE AS UNAME,
        T0.SIZE_S + T0.SIZE_M + T0.SIZE_L AS PROFILE_SIZE
    FROM (SAFILECOUNTSFOLDERS AS T0
    INNER JOIN SASTRUSER AS S0 ON T0.ACCOUNT_ID = S0.STRINGID)
    INNER JOIN SASTR AS S1 ON T0.FOLDER_ID = S1.STRINGID
    WHERE S1.STRVALUE = 'Profile'
) AS T2 ON T0.WGUID = T2.WGUID AND T0.UNAME = T2.UNAME)
LEFT JOIN (
    SELECT
        T0.WGUID,
        S0.STRVALUE AS UNAME,
        CAST(SUM(WSUMMARY) AS FLOAT) AS TOTAL_IMPACT
    FROM (SASYSUSERS AS T0
    INNER JOIN SAHEALTH AS T1 ON T0.WTIME = T1.WTIME)
    INNER JOIN SASTRUSER AS S0 ON T0.ACCOUNT_ID = S0.STRINGID
    WHERE
        T0.WTYPE = 1
        AND T1.WTYPE = 1
        AND T0.WUSAGE = 3
    GROUP BY
        T0.WGUID,
        S0.STRVALUE
) AS T3 ON T0.WGUID = T3.WGUID AND T0.UNAME = T3.UNAME)
LEFT JOIN (
    SELECT
        T0.WGUID,
        S0.STRVALUE AS UNAME,
        SUM(T0.TX_BYTES) AS TOTAL_TX_BYTES
    FROM SAAPP AS T0
    INNER JOIN SASTRUSER AS S0 ON S0.STRINGID = T0.ACCOUNT_ID
    WHERE
        T0.START_TIME >= GETUTCDATE() - 30
        AND T0.SYSACCOUNT = 0
    GROUP BY
        T0.WGUID,
        S0.STRVALUE
) AS T4 ON T0.WGUID = T4.WGUID AND T0.UNAME = T4.UNAME
WVD Users Hourly Views
The Assessment Summary Dashboard requires you to create a new View:
-
Go to Configure > Views
-
Click the padlock in the upper-right to edit.
-
Click the plus to add a new View.
-
Enter the following Settings:
-
View Name: SF_WVD_Users_Hourly
-
Expires in: 30 Days
-
Existing Category: General
-
When Expired: Overwrite Data
-
Do not check when overdue by 1 day(s)
-
Set the Refresh drop-downs to Daily, Inside, 24x7, and Every Day
-
-
Copy this SQL query, and paste it under SQL Selection > Generic.
-
Click Test SQL. A Test Success message should appear. If the test fails, the query may have been copied incorrectly.
-
Click Create View at the top-right.
Copy SF_WVD_Users_Hourly
SELECT
    T0.WGUID,
    GETUTCDATE() AS VWTIME,
    S0.STRVALUE AS UNAME,
    'Active' AS WUSAGE,
    DATEADD(HH,DATEDIFF(HH,0,T0.WTIME),0) AS HOTY,
    AVG(PRIV_CPU_MIPS+USER_CPU_MIPS) AS MIPS,
    AVG(MEM_AVG) AS MEM
FROM SASYSUSERS AS T0
INNER JOIN SASTRUSER AS S0 ON T0.ACCOUNT_ID = S0.STRINGID
WHERE
    S0.STRVALUE NOT LIKE '%SYSTEM%'
    AND T0.WTYPE = 1
    AND T0.WUSAGE = 3
GROUP BY
    T0.WGUID,
    S0.STRVALUE,
    DATEADD(HH,DATEDIFF(HH,0,T0.WTIME),0)
UNION
SELECT T0.*
FROM (
    SELECT
        T0.WGUID,
        GETUTCDATE() AS VWTIME,
        S0.STRVALUE AS UNAME,
        'Logged In' AS WUSAGE,
        DATEADD(HH,DATEDIFF(HH,0,T0.WTIME),0) AS HOTY,
        AVG(PRIV_CPU_MIPS+USER_CPU_MIPS) AS MIPS,
        AVG(MEM_AVG) AS MEM
    FROM SASYSUSERS AS T0
    INNER JOIN SASTRUSER AS S0 ON T0.ACCOUNT_ID = S0.STRINGID
    WHERE
        S0.STRVALUE NOT LIKE '%SYSTEM%'
        AND T0.WTYPE = 1
        AND T0.WUSAGE = 1
    GROUP BY
        T0.WGUID,
        S0.STRVALUE,
        DATEADD(HH,DATEDIFF(HH,0,T0.WTIME),0)
) AS T0
LEFT JOIN (
    SELECT DISTINCT
        T0.WGUID,
        S0.STRVALUE AS UNAME,
        DATEADD(HH,DATEDIFF(HH,0,T0.WTIME),0) AS HOTY
    FROM SASYSUSERS AS T0
    INNER JOIN SASTRUSER AS S0 ON T0.ACCOUNT_ID = S0.STRINGID
    WHERE
        S0.STRVALUE NOT LIKE '%SYSTEM%'
        AND T0.WTYPE = 1
        AND T0.WUSAGE = 3
) AS T1 ON T0.WGUID = T1.WGUID AND T0.UNAME = T1.UNAME AND T0.HOTY = T1.HOTY
WHERE T1.HOTY IS NULL
Assign Views
After the SF_WVD_Users and SF_WVD_Users_Hourly have been created, they must be assigned to the SF_AVD Assessment and Management Role:
-
Go to Configure > Roles
-
Use the drop-down at the top to select the SF_AVD Assessment and Management Role
-
Click Views, then check SF_WVD_Users, and SF_WVD_Users_Hourly.
-
Click Save Changes at the top-right.
Prerequisites
For this AVD DEX Pack, it is necessary that the user has administrative or delegated permissions on both the SysTrack Cloud Portal and the Azure Portal.
EXAMPLE: Tip: In a Browser, have one tab connected to SysTrack Cloud and another tab open to Azure Portal using the same privileged account.
Other Integrations
SysTrack Configure provides additional configuration settings for interaction with the following external third-party services:
Azure Virtual Desktop
This section explains how to set up the integration between SysTrack and Azure Virtual Desktop.
Authentication
For authentication, SysTrack requires configuration of a Principal User (Application) in Azure Active Directory.
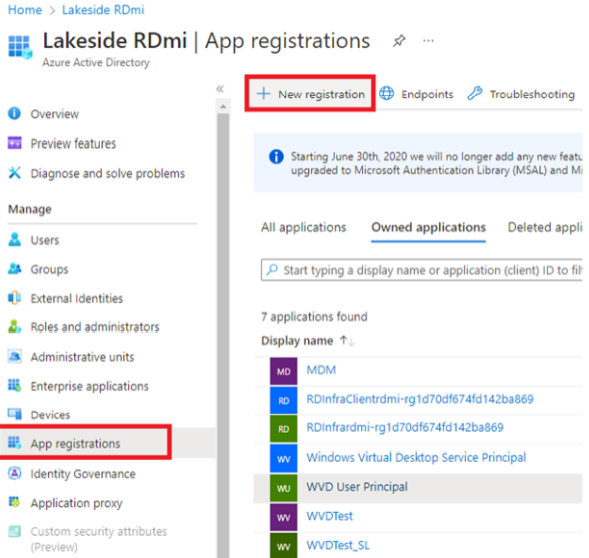
1. Go to the URL: https://portal.azure.com/#home and access Azure Active Directory.
2. Under the left Manage menu, click App registrations, then click and New registration.
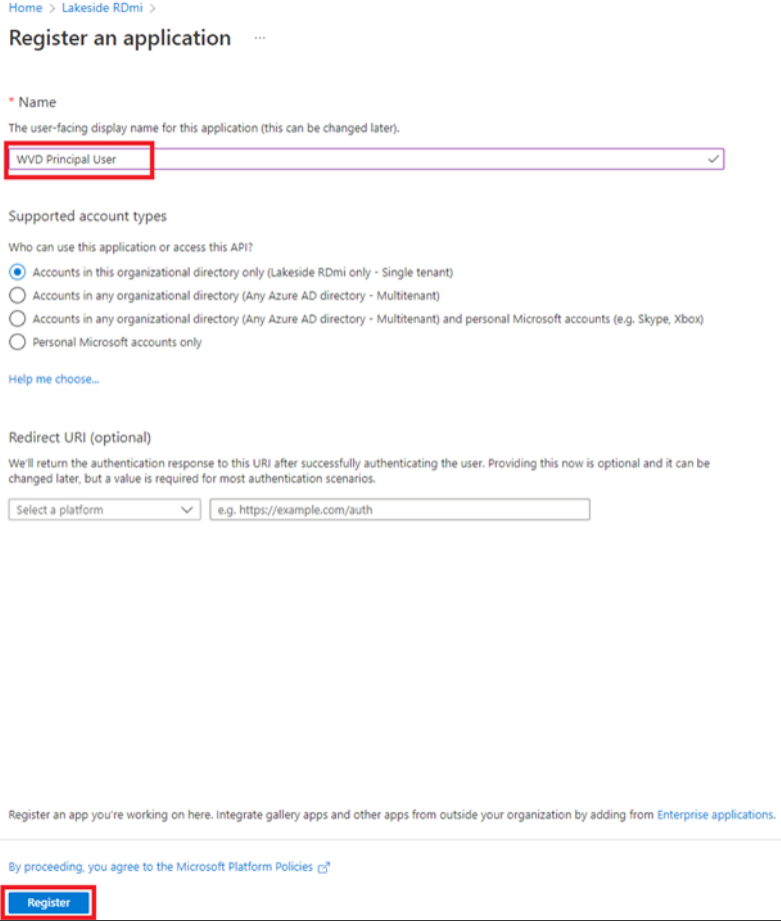
3. On the Register an application dialogue, type a Principal User name in the Name field, select Accounts in this organizational directory only, then click Register. You can choose any name, but in this example, we are using the name WVD Principal User, which you will see in the following steps.
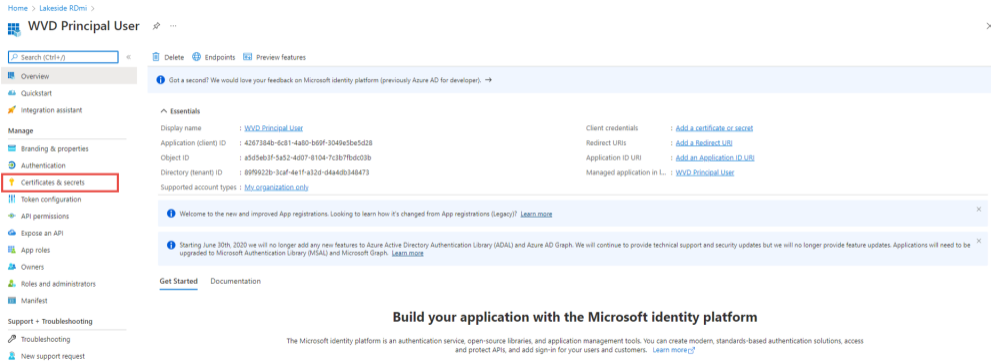
4. On the application Overview page under the left Manage menu, click Certificates and secrets.

5. On the Certificates & secrets page, select the Client secrets tab, then click and New client secret.
6. On the Add a client secret dialog, type a Description, select when the secret Expires, and press Enter.
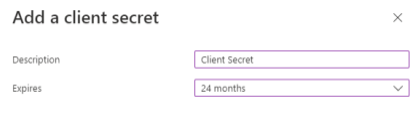
EXAMPLE: IMPORTANT: In the next step, be sure to store the Value of the client secret where you will be able to find it. It cannot be retrieved at a later time.
7. A new client secret is created. Copy the value and save it in an easy-to-find location. This client secret will be needed to configure the Azure Virtual Desktop integration in SysTrack Configure.

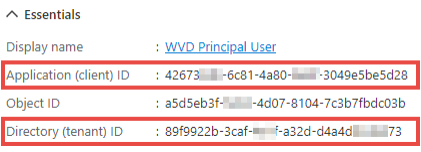
8. In addition to the client secret, make note of the Application (client) ID and Directory (tenant) ID which you can find on the Overview page of your Principal User.
Configuring Azure Virtual Desktop
Log Analytics Workspace
To retrieve any data through the API endpoints, first configure one Log Analytics Workspace which you will later use to configure the Diagnostic Settings on each level. You can type the name into the search bar or click the icon if shown in the recent Azure Services list.
1. Click on the Log Analytics workspaces icon to display a list of workspaces already configured.
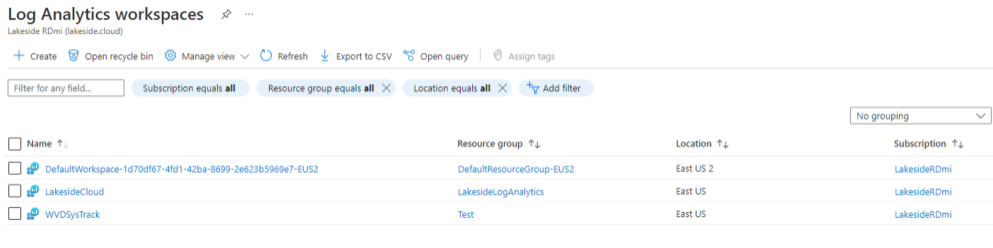
EXAMPLE: NOTE: Lakeside recommends using the same workspace for all Diagnostic data collected by SysTrack.
2. If there are no workspaces configured— or you want to use a different one—create it by clicking + Create on the left side of the menu.
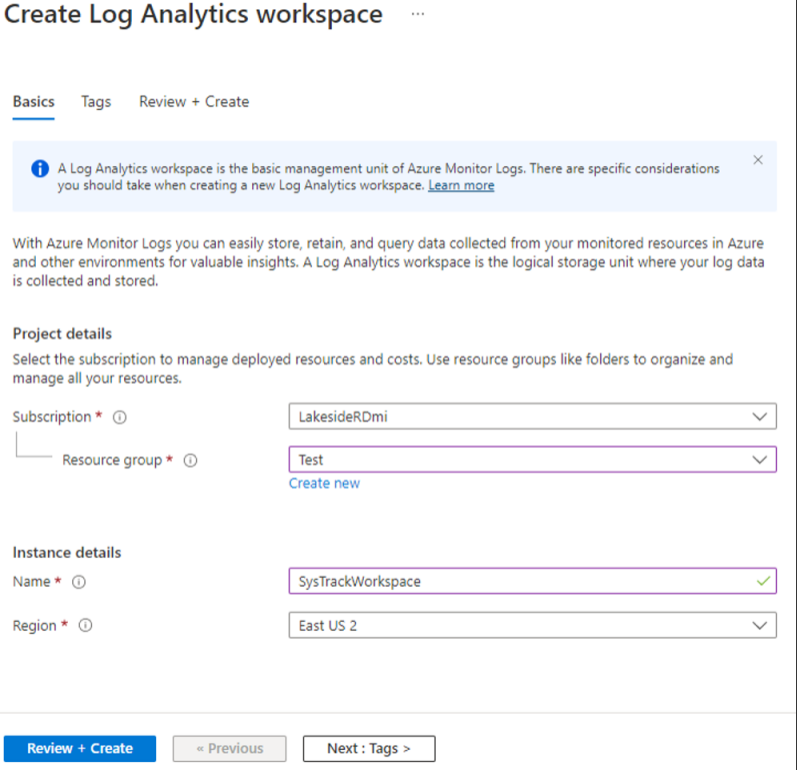
3. After selecting the Resource group and entering a Name, click Review + Create to display a validation confirmation page.
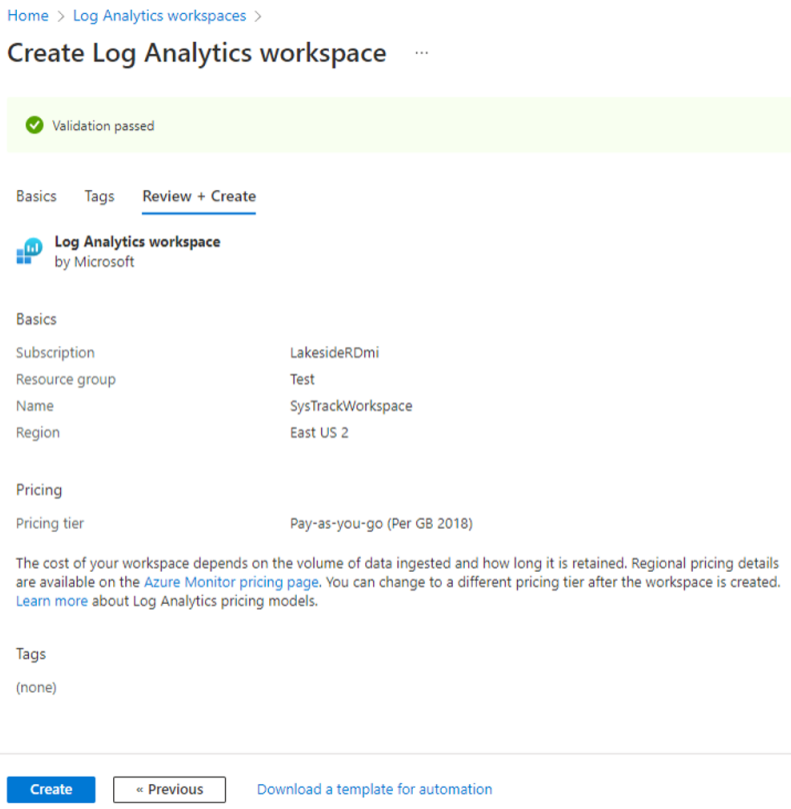
4. Click Create to finalize your workspace.
Navigate to Azure Virtual Desktop
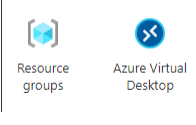
There are two areas where roles can be assigned: the Resource Group and the Azure Virtual Desktop. For either area, you can type the name into the search bar or click the icon if shown in the recent Azure Services list.
-
Selecting Resource groups will display all available resource groups you can configure. If you are unsure which resource group to assign roles to, you can also navigate from Host pools, Application groups, or Workspaces to the desired Resource Group.
-
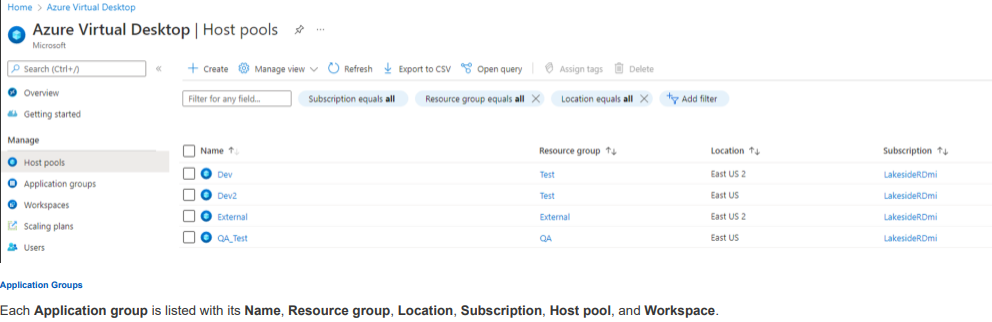
Selecting Azure Virtual Desktop will display a Manage menu on the left with Host pools, Application groups, and Workspaces. Clicking on any of these options will display a list of available items on the right. The following examples show each type and what will be displayed.
Host Pools
Each Host Pool is listed with its Name, Resource group, Location, and Subscription, plus a few other columns.
Application Groups
Each Application group is listed with its Name, Resource group, Location, Subscription, Host pool, and Workspace.

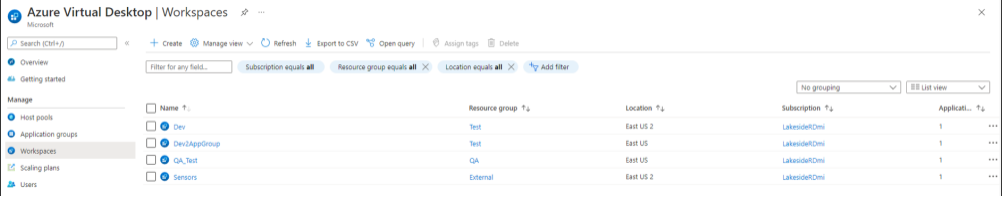
Workspaces
Each Workspace is listed with its Name, Resource group, Location, Subscription, and the number of Application groups it has been assigned.
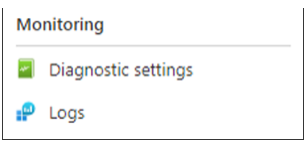
Configure Diagnostic Settings
To enable data collection, first configure the Diagnostic settings under the Monitoring menu on each level and item you want to collect from. For example, to collect diagnostic data for a specific Host Pool, you would do the following:
1. Select a Host Pool from the list, then click Diagnostic settings on the Monitoring menu.
EXAMPLE: NOTE: To avoid duplicate data in the tables, Lakeside recommends having only one diagnostic setting configured. For example, you can either create one setting per type or one setting for all types, but don’t use multiple types in different settings. Also remember to use always the same Analytic Logs Workspace.
2. On the Diagnostics Settings page, click + Add diagnostic setting.
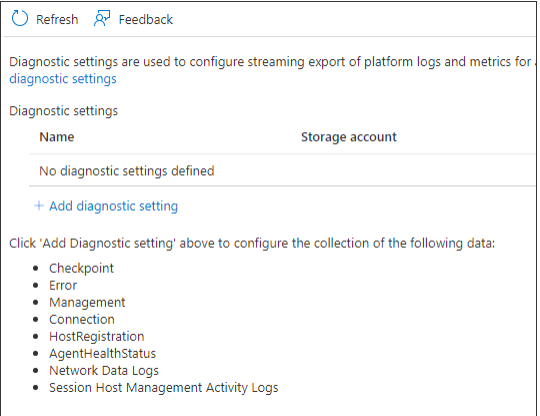
3. Enter a Diagnostic setting name and select the Categories of data you want to collect. Under Destination details select Send to Log Analytics workspace and provide your Subscription and Log Analytics workspace names. The only categories SysTrack will collect are Checkpoint, Error, Management, Connection, and Feed.

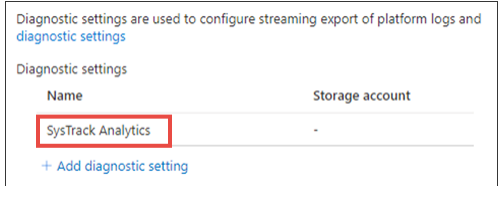
4. When satisfied with your selections, click Save to create the setting.
5. Close the pane by clicking the X in the upper right corner. You should see your new setting in the list.
Test the Diagnostic Logs
After clicking the Logs button on the left menu, you can check what data you can retrieve from the different queries. This web interface provides many more options. The only queries SysTrack currently supports are: WVDConnections, WVDFeeds, WVDManagement, WVDCheckpoints, and WVDErrors. However, not all types are supported for each structure type, as shown in Supported Queries.

Configure Roles
For SysTrack to be able to retrieve any data, you need to set some roles. There are different ways to set it up, some of which are described here.
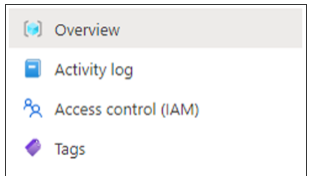
Regardless of setup method, begin by clicking Access control (IAM) on the menu of the selected object, which can be a Resource Group, a Host Pool, an Application Group, or a Workspace. All should display a menu similar to the following:
How to Assign Roles
The following steps apply to any object.
1. Click Access control (IAM) on the object's menu.
2. On the right side, you can click Role assignments to view the roles currently assigned.
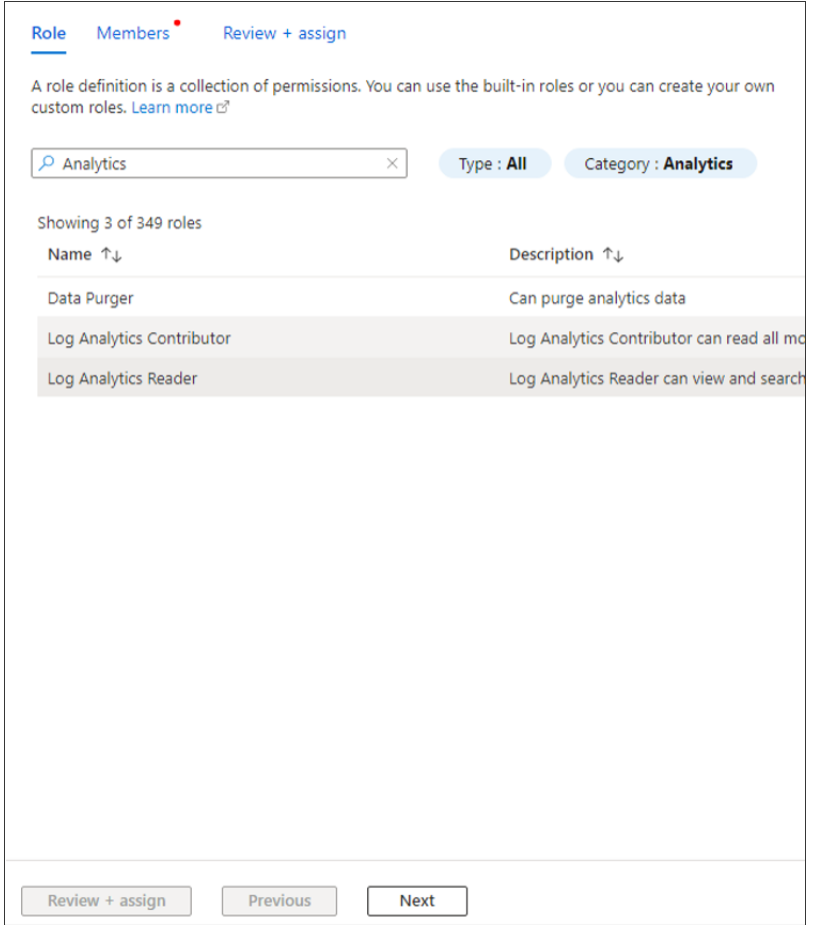
3. To add a new role, click +Add on the top left and select Add role assignment.

4. On the next page, select a role then click Next. There are many roles, so you may want to narrow your choices by either typing the name or parts of it into the search field or by selecting a Type or Category. In this example, Log Analytics Reader is selected. See what Roles to Assign for a discussion of role selection criteria.
5. On the next page, you can select the members you want to assign to that role—which in this case will be the WVD Principal User you created above. Click + Select members to display the dialog shown below on the far right side. You can use the search bar to narrow down the list. After finding the user you want to add, select that user, then click Select.
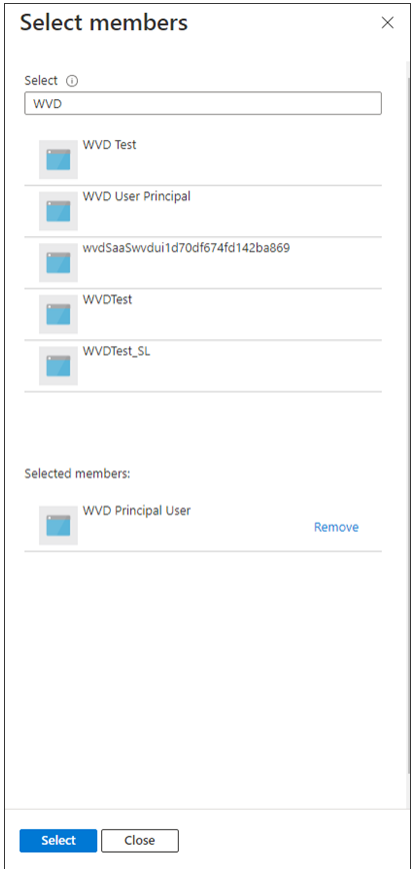
6. The selected user is displayed in the Members list as shown below. Click Review + assign or Next to advance to the last page and display an overview of your selections.
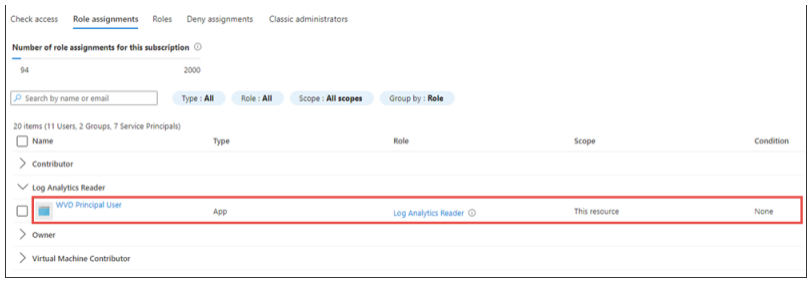
7. Click Review + assign. The specified member will be added to the selected role and will now appear on the Role assignments page.
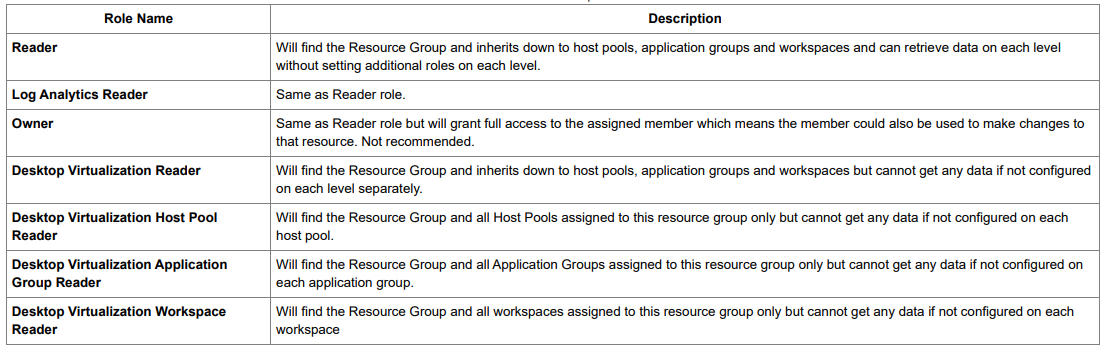
What Roles to Assign
The following two tables list the different roles you can assign and the levels they need to be assigned to. The recommended configuration is also the easiest: Assign either the Reader role or the Log Analytics Reader role to your WVD Principal User on the Resource Group or Subscription level as shown in the first table. If you do so, there is no need to assign any roles on any other object because they are inherited down, giving you access to retrieve the desired data. You can also assign roles on the Host Pool, Application Group, and Workspace levels as shown in the second table.

SysTrack Configuration
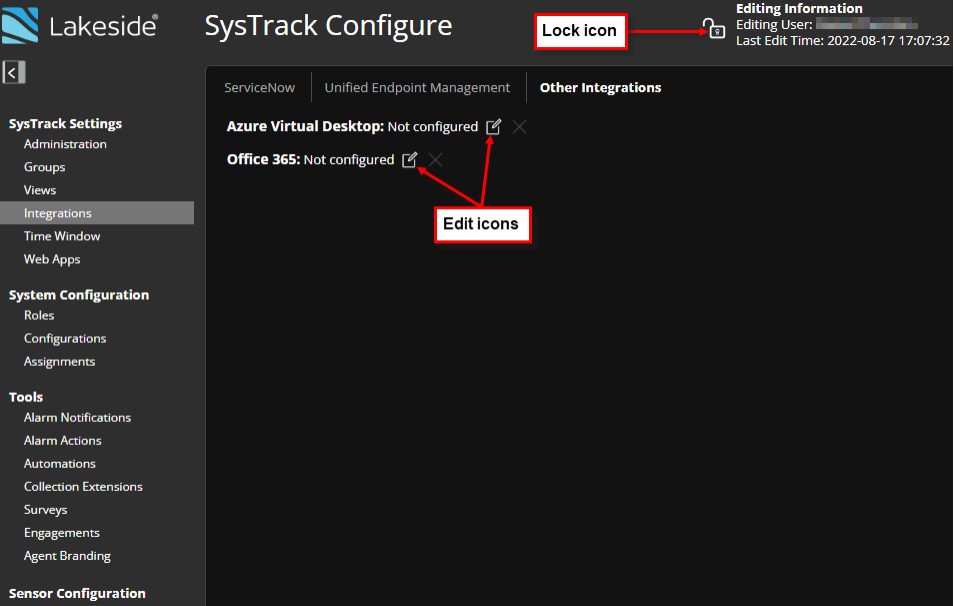
After completing the configuration above, Azure Virtual Desktop data collection can be set up using SysTrack Configure under Integrations as shown below.
1. Log into SysTrack Configure with a user that has rights to modify settings in SysTrack Configure.
2. Select the Integrations page under SysTrack Settings.
3. Click the Lock icon in the upper right to allow for editing.
4. On the Other Integrations tab, click the Edit icon next to Azure Virtual Desktop.
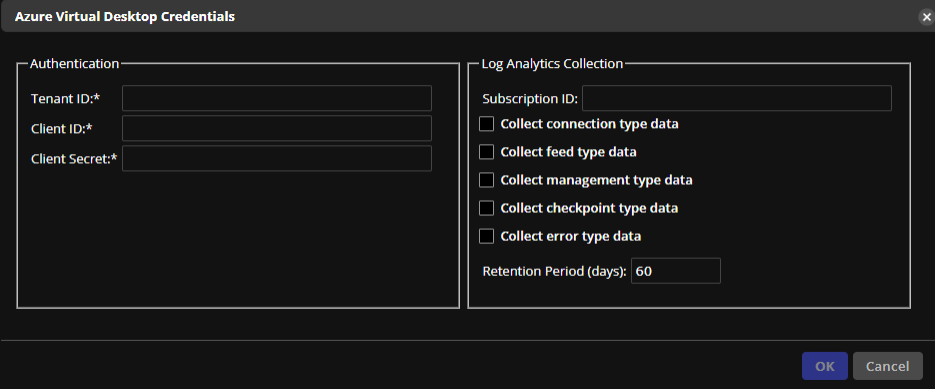
5. In the Authentication fields, enter the following information:
-
Tenant ID: The tenant ID you noted above.
-
Client ID: The client ID you noted above.
-
Client Secret: The client secret you noted above.
6. In the Log Analytics Collection fields, enter the following information:
-
Subscription ID: Your Azure subscription ID.
-
Collect types of data: Select one or more data types to collect.
-
Retention Period (days): Specify how long to retain the collected data.
7. Click OK, then click Save Changes.
8. Click the open Lock icon to end your editing session.
Office 365
This section is a resource to be used in conjunction with the SysTrack Kit Office 365 Monitoring, provided by Lakeside Software.
Dashboard Data
SysTrack dashboards have a wide range of data sources. These dashboards are a result of custom collection of the Office 365 Graph API.
1. Go to the URL: https://portal.azure.com/#home
2. Click through the following three app registration menu choices
On This Page