Office 365
This section is a resource to be used in conjunction with the SysTrack Kit Office 365 Monitoring, provided by Lakeside Software.
Dashboard Data
SysTrack dashboards have a wide range of data sources. These dashboards are a result of custom collection of the Office 365 Graph API.
-
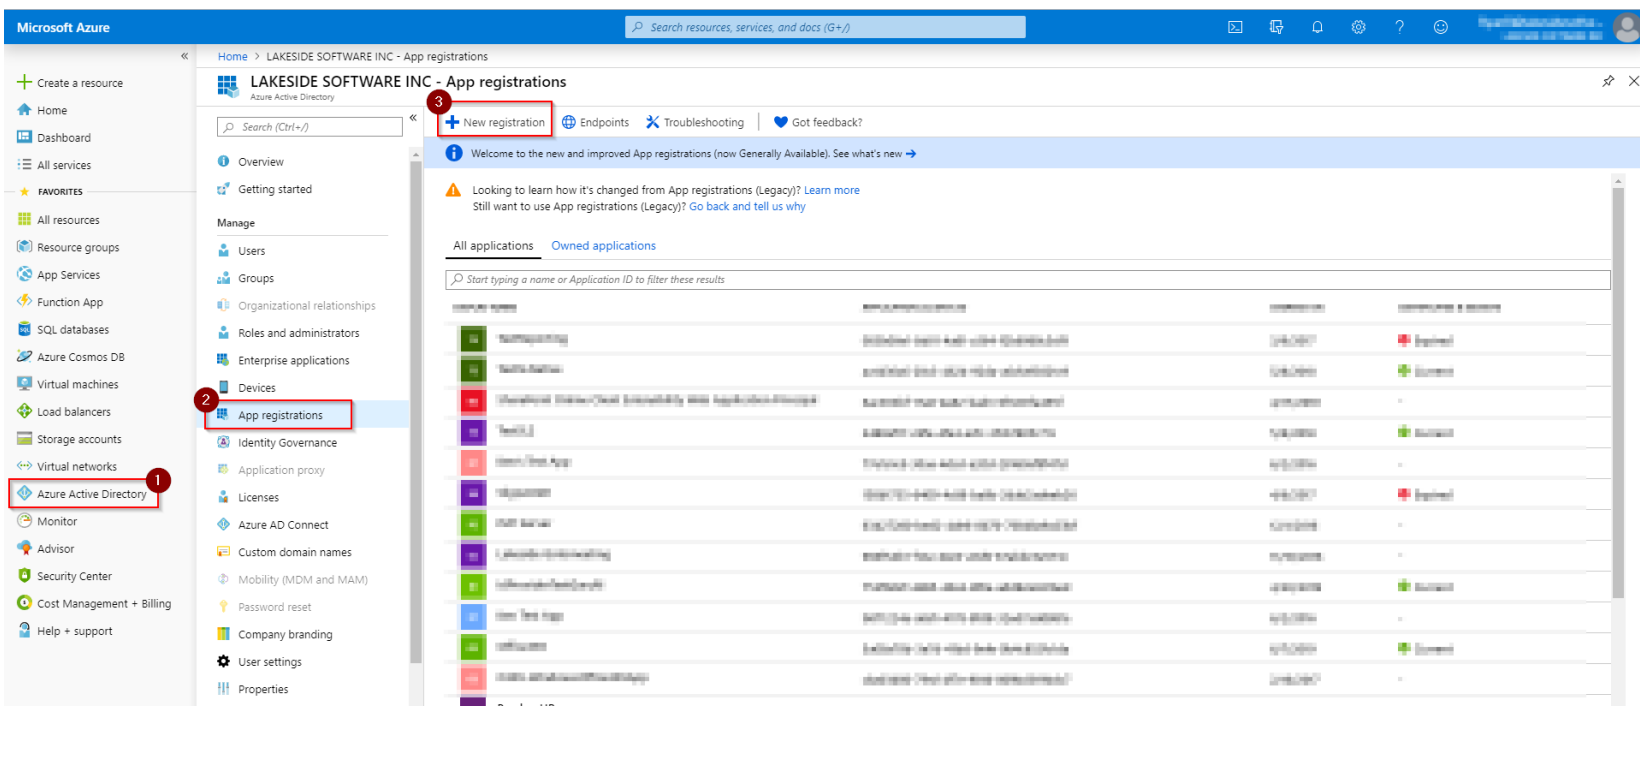
Go to the URL: https://portal.azure.com/#home
-
Click through the following three app registration menu choices:
-
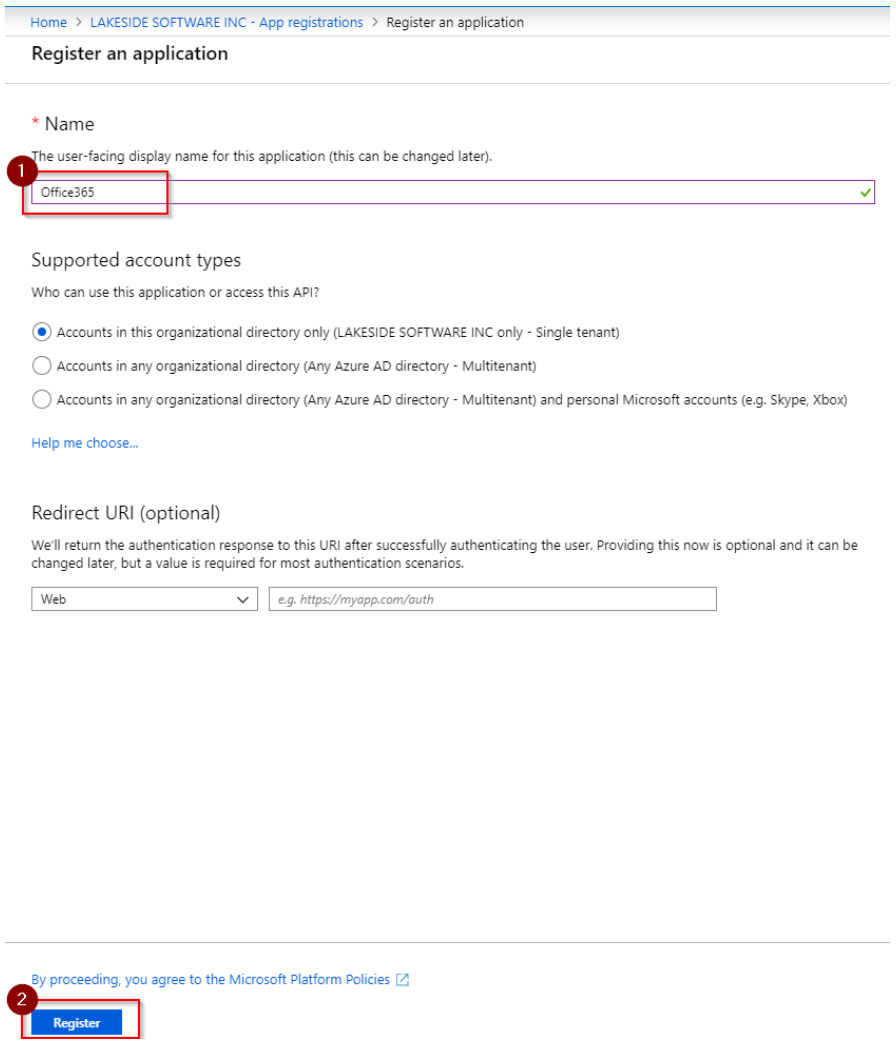
Name the application Office365, and then click Register.
-
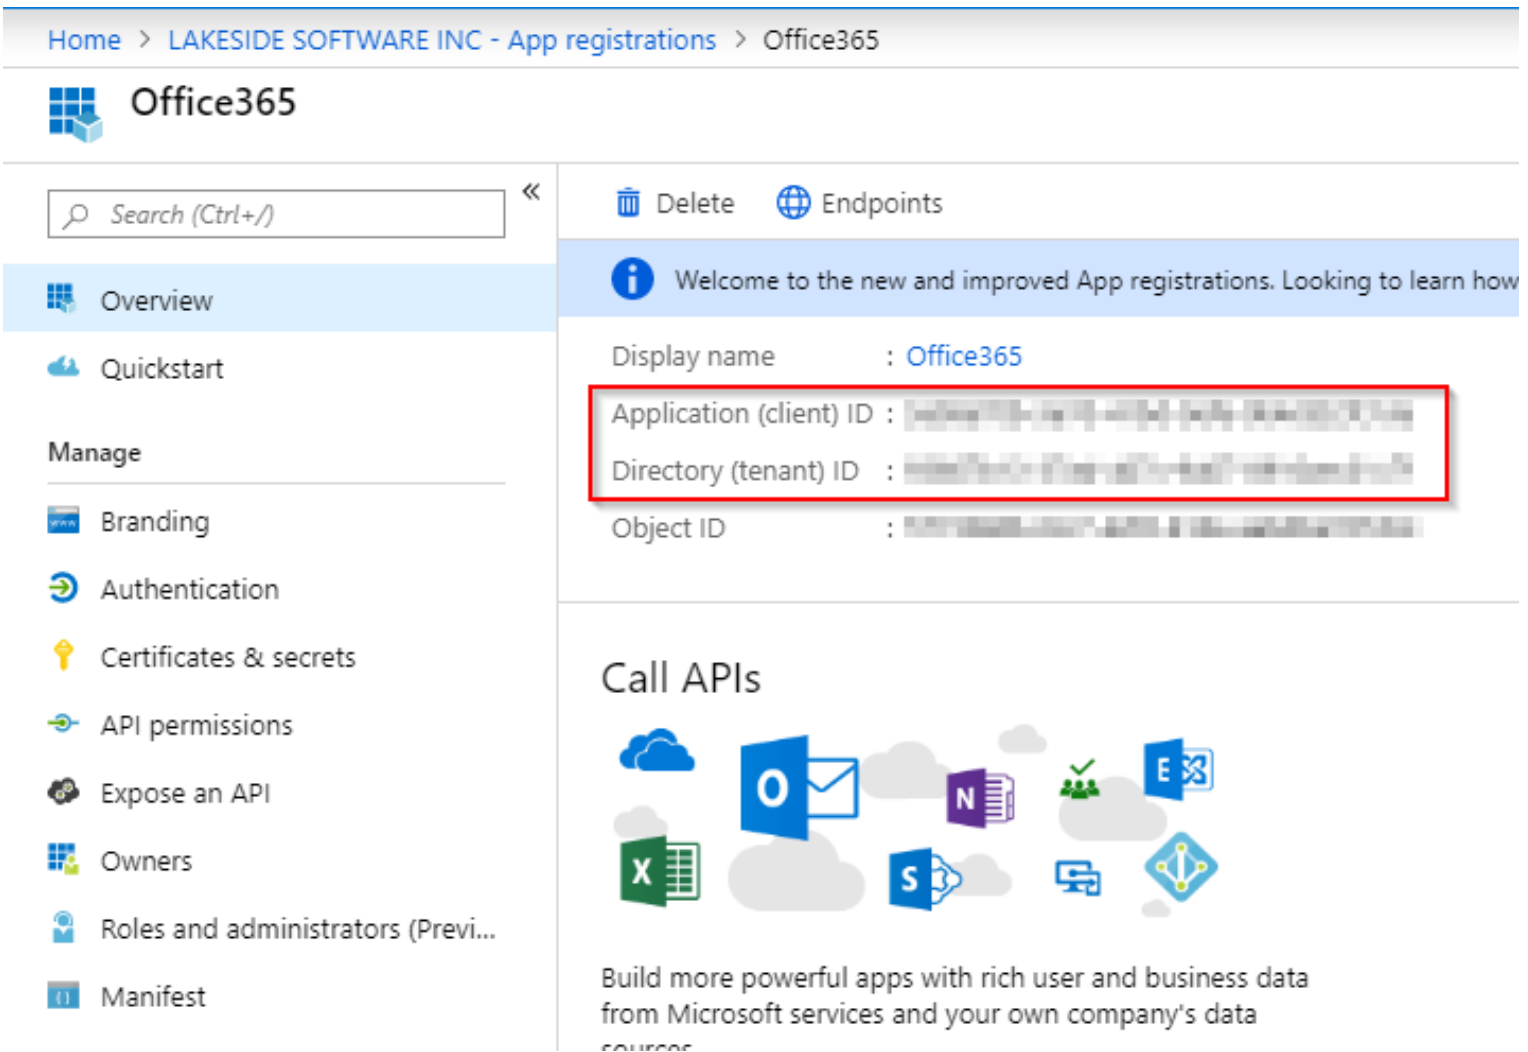
Locate and click into the newly created Office365 App Registration.

-
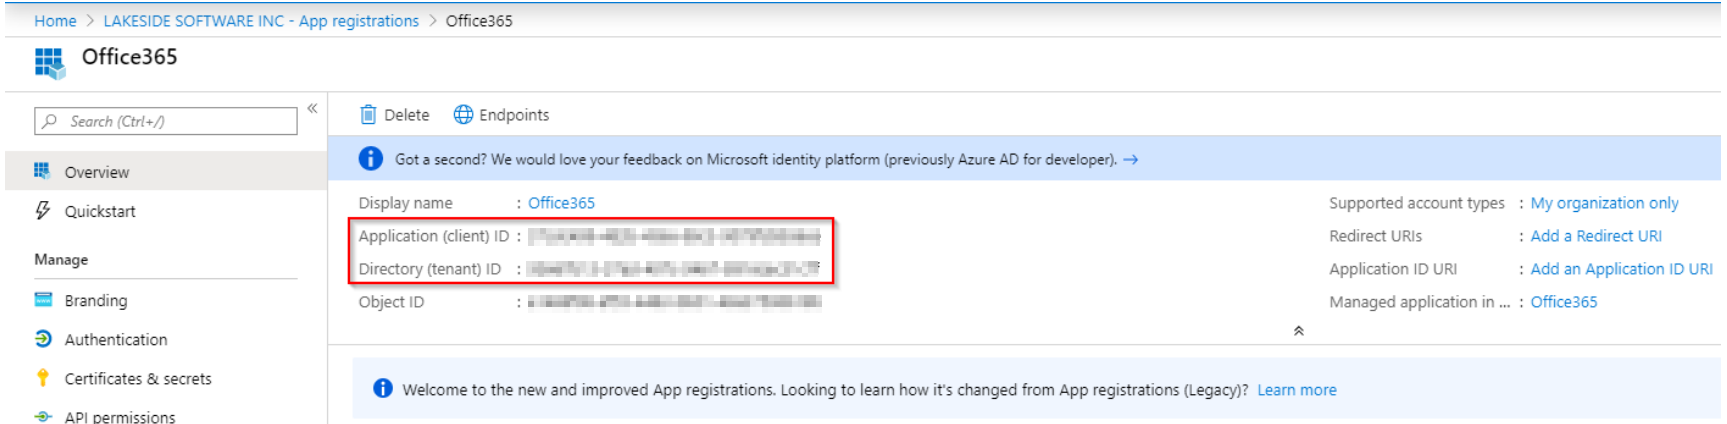
Make a note of the Application (client) ID and Directory (tenant) ID, which will be used later.
-
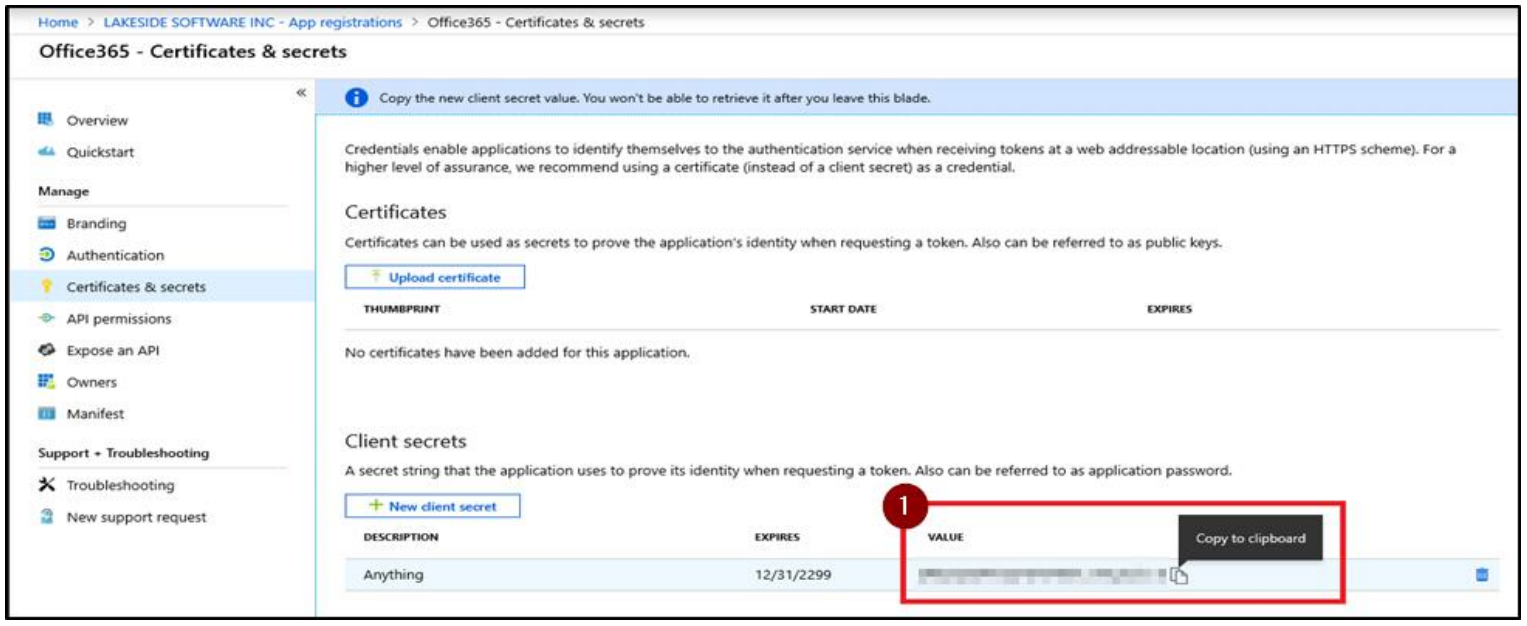
Click into Certificates and secrets and add a new client secret.
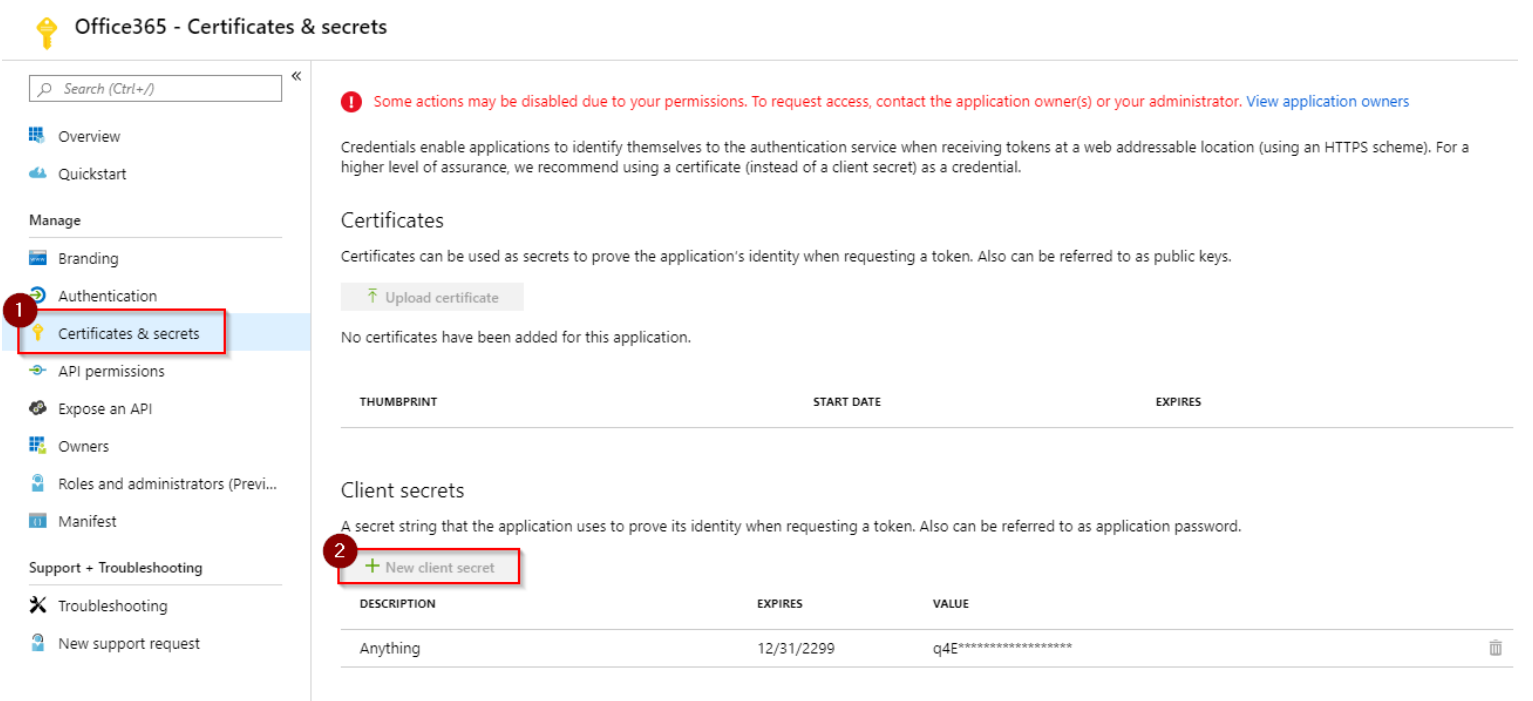
NOTE: In the next step, be sure to write down the secret or copy it to where you can find it later. This is the only time the secret is visible.
-
Make a note of the secret VALUE.
-
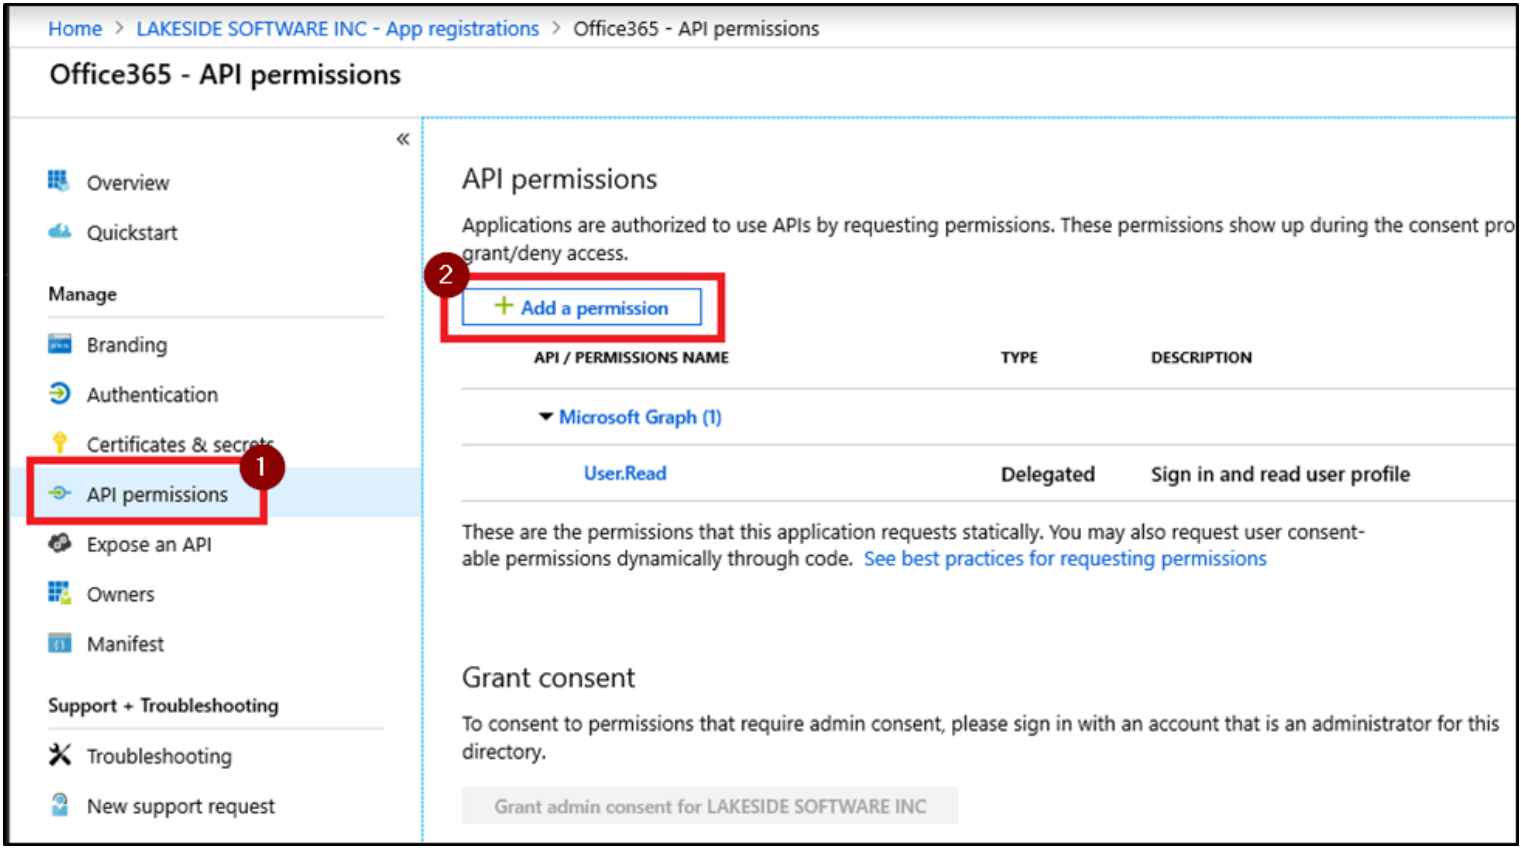
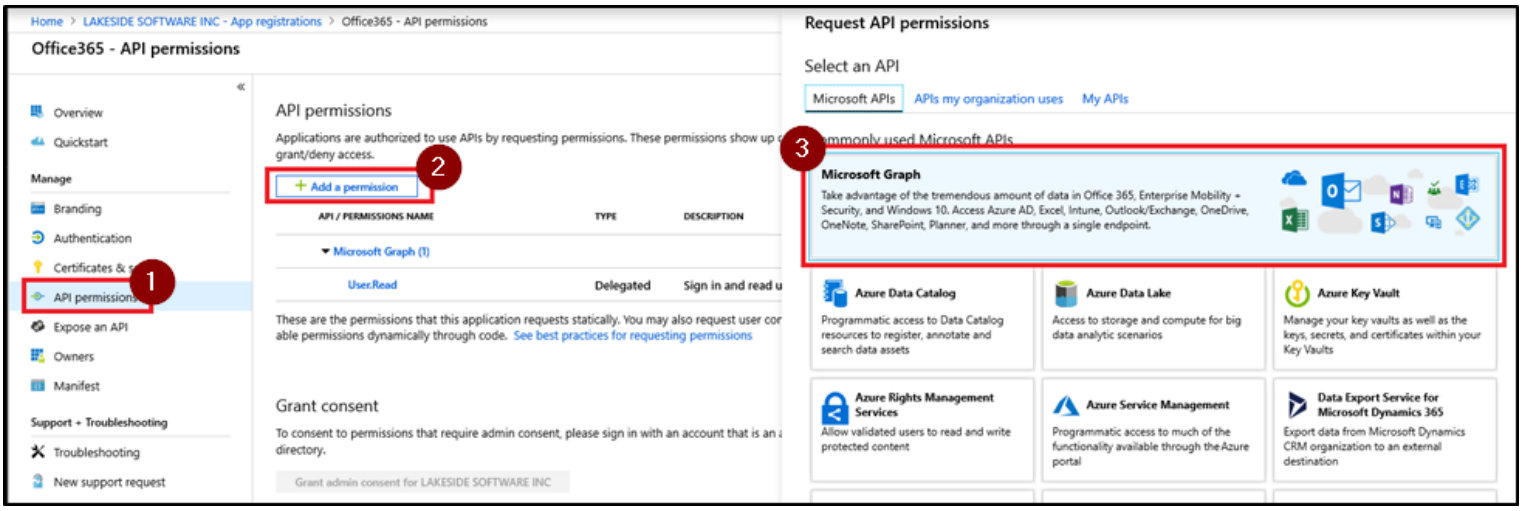
Click into API permissions, and then click Add a permission.
-
On the Microsoft APIs tab, select Microsoft Graph.
-
Select Application Permissions.
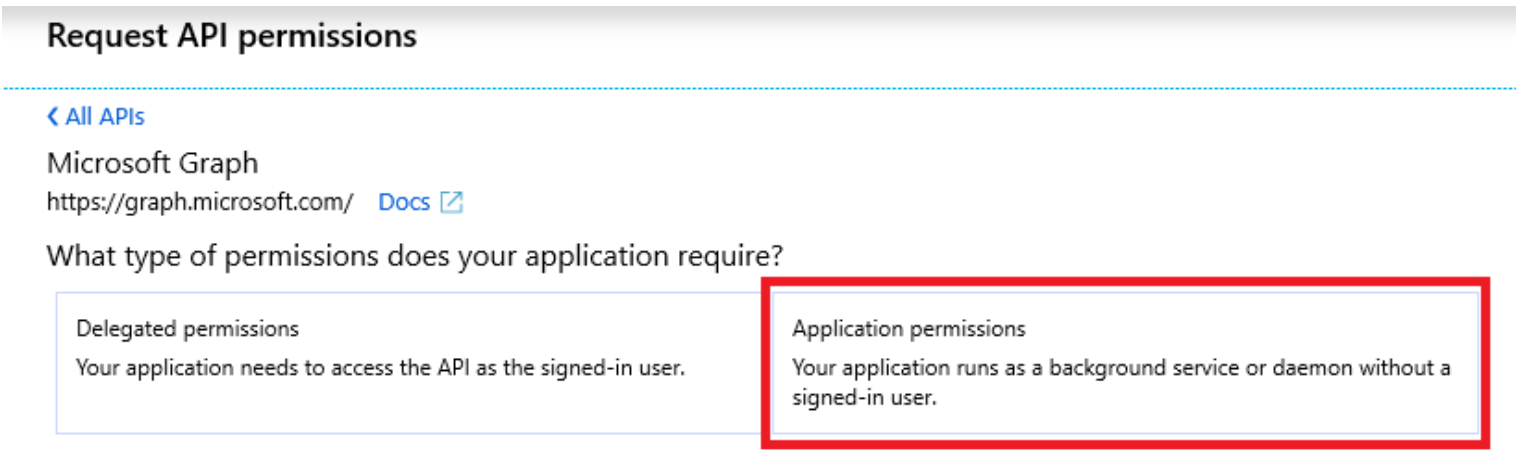
NOTE: In the next step, an Admin will need to consent to adding the permissions.
-
Expand Reports, select Reports.Read.All, and click Add Permissions.
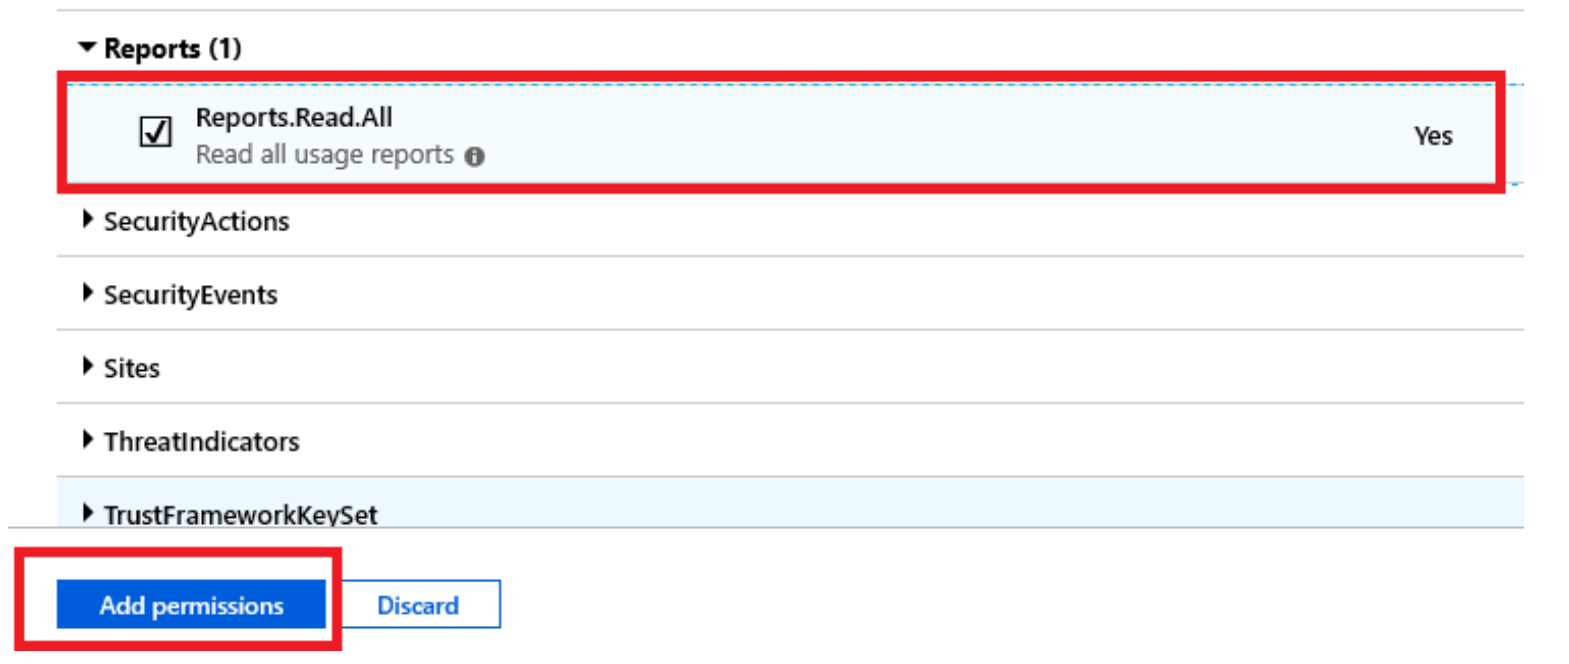
If you want us to collect user information through Azure AD, you need to select the User.Read.All permission.
-
Log into SysTrack Configure with a user that has TAS rights to modify settings in SysTrack Configure.
-
Select the Integrations page under SysTrack Settings.
-
Click the Lock icon in the upper right to allow for editing.
-
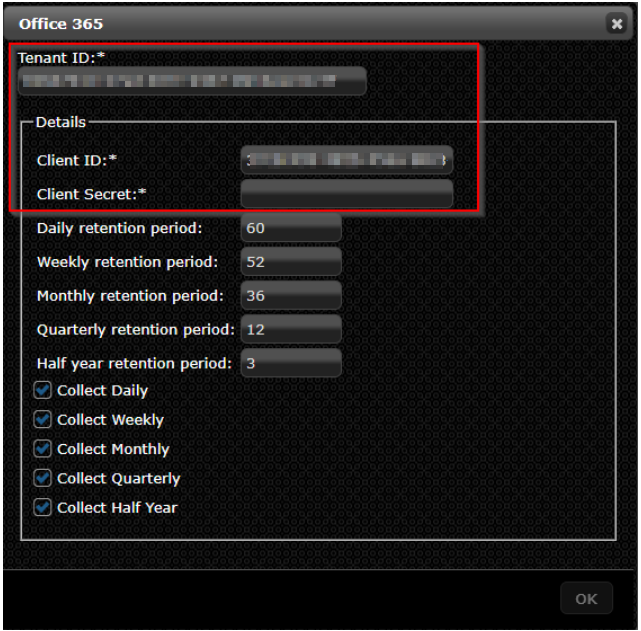
On the Other Integrations tab, click the Edit icon next to Office 365 and enter the following information:
-
Tenant ID (previously called Directory (tenant) ID)
-
Client ID (previously called Application (client) ID)
-
Client Secret (as recorded in prior step)
-
It is recommended that you leave the default retention periods and enable all collection intervals by selecting Collect Daily, Collect Weekly, etc.
NOTE: You can find the Tenant ID and Client ID information on the app Overview page.
-
-
Click OK, and then click Save Changes.
-
Click the open Lock icon to end your editing session. The integration for Office 365 data collection has now been successfully configured.
Set User Information to Display
To ensure that names for users, groups, and sites are shown in the data SysTrack collects from this integration, you must follow these steps to edit a setting in Microsoft 365 admin center:
-
Open the Microsoft 365 admin center.
-
Go to the Services page at Settings > Org Settings > Services page.
-
Select Reports.
-
Uncheck the check box for Display concealed user, group, and site names in all reports.

-
Select Save.
TIP: For more information on this setting, see Microsoft's documentation.
On This Page