Alarm Notifications
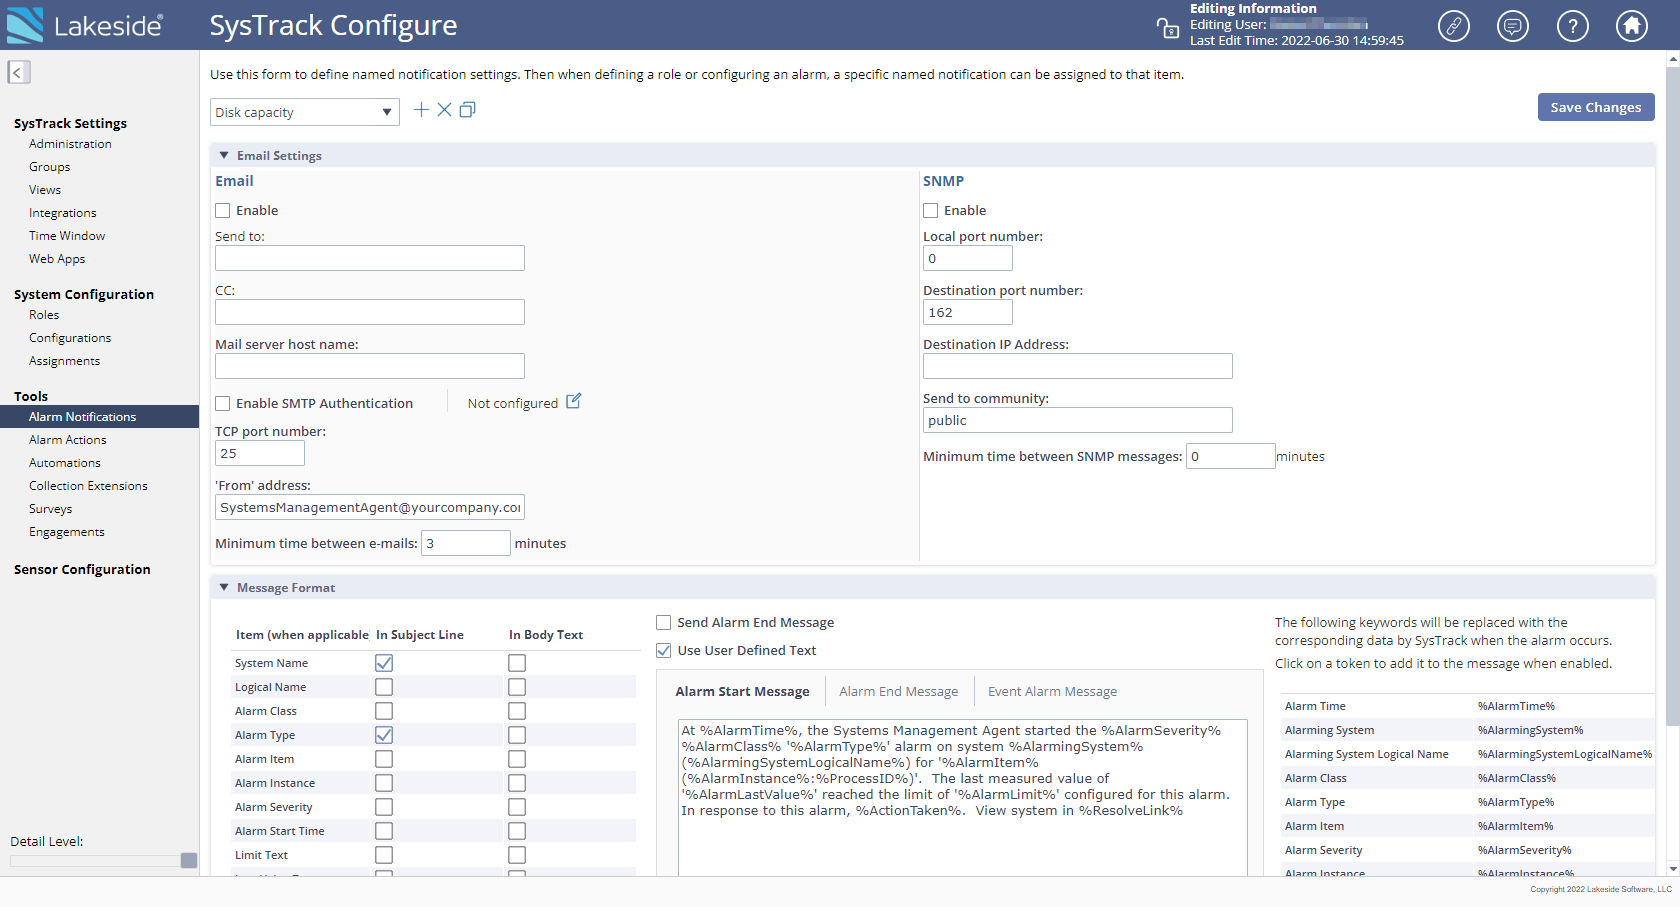
An alarm is triggered when a monitored item surpasses the threshold values configured for an alarm. When an alarm is triggered, the system's SysTrack Agent can notify one or more persons via email and/or SNMP. The Alarm Notifications page allows you to set up named notifications which can be assigned to a role or an alarm.
Configure a Notification Profile
- Select Alarm Notifications from the navigation pane.
-
Click the + (plus) icon to display the Create New Profiles dialog. Alternately, you can click the
 (duplicate) icon and rename and amend an existing profile to your specifications.
-
Enter a Name for the new profile, and click the Create button.
Set up Email and SNMP Notifications
- To set up an email notification for the profile, select the Enable check box.
- Enter the email address of the person to whom you wish to send the notification in the Send to: field.
- Optionally enter an additional email address in the CC: field.
- Enter the Mail server host name and the TCP port number in the appropriate fields.
- Optionally check Enable SMTP Authentication, and (if not configured) click the Edit button, then in the SMTP Authentication dialog, enter a Host Configuration with Mail server host name, Username, and Password.
- Enter the TCP port number.
- Enter the email 'From' address.
- Optionally change the Minimum time between e-mails in minutes from the default of 3 minutes.
- Optionally, select the Enable check box to send SNMP notifications, and complete the fields as necessary.
Set up the Notification Message Format
The text body of the alarm notification message can be composed of selected SysTrack text options, or you can instead select Use User Defined Text.
- Select the Send Alarm End Message check box.
- To use SysTrack selected text options, select the In Subject Line options to determine what s included in an email notification's subject line. The subject line will include a truncated version of your selections.
- Select the In Body Text check box to determine what is included in the email notification's body. The options are the same as for the Subject line, but they will not be truncated.
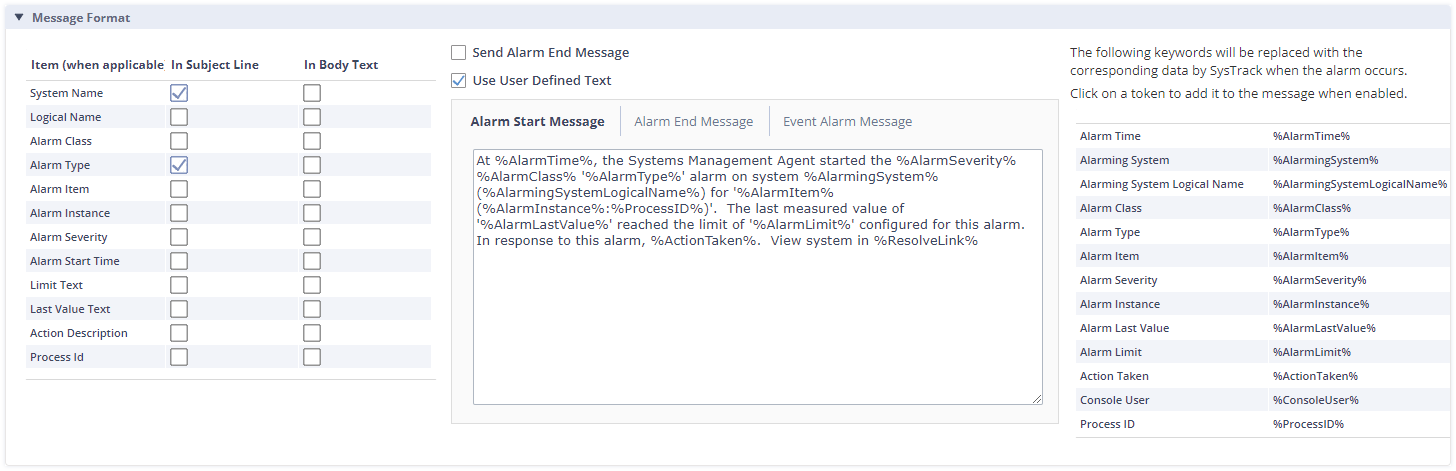
The following table describes each of the Subject /Body Text options:
| Item (when applicable) | Description |
|---|---|
| System name | The name of the system that triggered the alarm (enabled by default). |
| Logical Name | The system's logical name. |
| Alarm Class | The broadest category within the Alarm Profile that will trigger an alarm (i.e.: System, Disk, Net, etc.). Classes can be understood by examining the page tabs in the Alarm Profile Configuration form. |
| Alarm Type | These alarms fall within the Class. For example, if the Class is "Disk", the Type could be "Read Rate" or "Free Space". Almost each Class has a subset of Types (set by default). |
| Alarm Item | Some Classes and Types have more than one member in the group. If a system has more than one disk, both primary and logical, then each will show up at a different Item (set by default). |
| Alarm Instance | An instance is when an item is opened more than once. For example, if multiple copies of NotePad.exe are opened on a terminal server, this would be X number of instances. Each instance is designated by the Process ID (PID) of the application. Since the alarm maybe be triggered by only one of the instances, it is important to note exactly the application instance that initiated the alarm. |
| Alarm Severity | Will state whether the alarm condition is yellow or red. |
| Alarm Start Time | The first recorded time of the alarm trigger, based on the Severity. |
| Limit Text | The limit description that was exceeded. This is not the value that triggered the alarm, but the threshold name. |
| Last Value Text | The value that was last recorded by the SysTrack Agent. It may not be the value that triggered the alarm. |
| Action Description | The response to the system alarm initiated by the SysTrack Agent. |
| Process ID | The Process ID (PID) is a number used by Microsoft Windows to temporarily uniquely identify a process. |
User Defined Text
- Select the Use User Defined Text check box to allow editing of the default Alarm Start Message, Alarm End Message, and Event Alarm Message as shown below.
- Click on a keyword in the list (shown to the right below) to add it to the alarm message.
- If desired, click on the Alarm End Message and/or Event Alarm Message tabs and edit as desired.
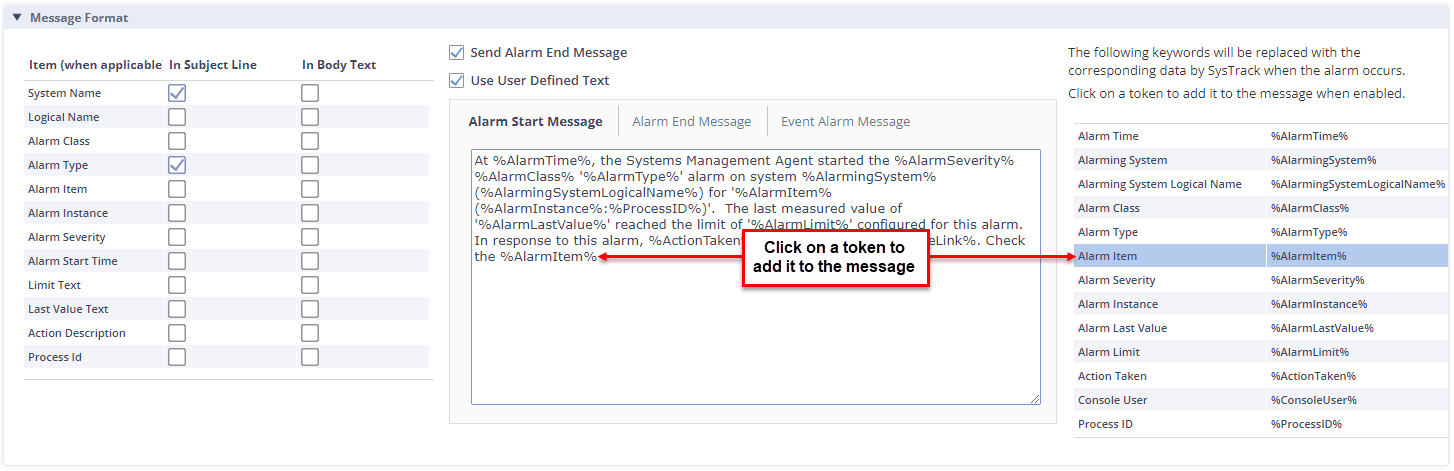
- When you are done, click the Save Changes button on the top right of the page.
On This Page